

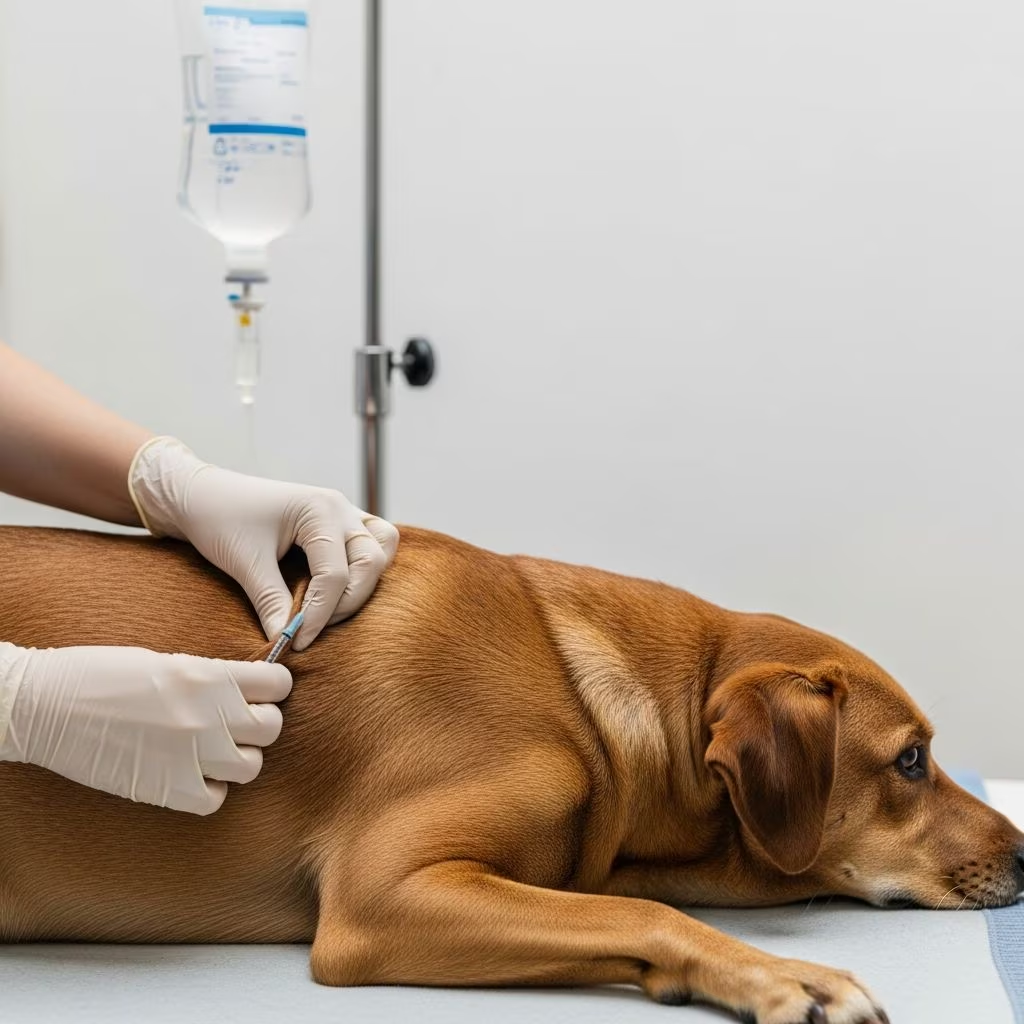
Subcutaneous Fluid Administration in Dogs: A Complete Guide
Subcutaneous fluid administration, commonly referred to as “subQ” or subcutaneous hydration therapy, represents an effective method for providing supplemental fluids to dogs that require additional hydration support. This technique involves administering fluids directly under the skin, allowing them to be gradually absorbed into the body over several hours. Unlike intravenous (IV) fluids, which require hospitalization and professional administration, subcutaneous fluid therapy can be safely administered at home by pet owners with proper training and guidance from their veterinarian. Many dog owners initially feel apprehensive about learning this technique, but subcutaneous fluid administration is surprisingly straightforward and manageable once you understand the fundamentals.
Why Your Veterinarian Recommends Subcutaneous Fluid Therapy
Your veterinarian may recommend at-home subcutaneous fluid treatment for several important medical reasons. Supplemental fluids can significantly benefit dogs with various chronic health conditions that compromise their ability to maintain adequate hydration independently. Home fluid therapy is most commonly recommended for dogs diagnosed with chronic kidney disease, also known as chronic renal failure, where the kidneys can no longer filter waste and concentrate urine effectively.
Beyond kidney disease, subcutaneous fluid therapy may be prescribed for dogs experiencing dehydration due to other debilitating conditions, as a preventative measure for senior dogs at risk of dehydration, or for pets unable to drink sufficient fluids on their own. The benefits of at-home fluid therapy include maintaining proper hydration levels, improving kidney function, reducing electrolyte imbalances, and overall enhancing your dog’s quality of life and longevity.
Understanding the Two Administration Methods
There are two primary methods for administering subcutaneous fluids at home: the fluid bag method with a drip set, and the syringe method with a butterfly catheter. Each approach has distinct advantages depending on your dog’s specific needs and your comfort level with the technique.
The Fluid Bag Method
The fluid bag method, which uses a fluid bag with a complete drip set, is ideal for administering larger volumes of fluid and typically works faster than the syringe method. This approach utilizes gravity to facilitate fluid flow, making it a reliable option for dogs requiring substantial fluid supplementation. The bag method provides a clear visual reference through the marked measurement lines on the bag, allowing you to monitor exactly how much fluid you’re administering to your pet.
The Syringe Method
The syringe method, which employs a syringe with a butterfly catheter, offers more precise control over the administration rate and volume. This technique is particularly useful for dogs that may be sensitive or anxious, as it allows for slower, more controlled fluid delivery. The syringe method can also be advantageous for administering smaller fluid volumes.
Preparing Your Supplies and Equipment
Before beginning subcutaneous fluid administration, you’ll need to gather all necessary supplies and ensure everything is properly organized. Your veterinarian should provide you with sterile isotonic saline solution or lactated Ringer’s solution in a fluid bag, along with a subcutaneous fluid administration set that includes tubing and a needle. Additional supplies you’ll need include alcohol pads for disinfection, clean towels, and access to warm water for temperature regulation of the fluids.
Store your fluid bags and administration sets in a cool, dry location as directed by your veterinarian. Never refrigerate the fluids, as cold fluid administration can cause discomfort to your dog. When ready to use, fluids should ideally be warmed to approximately body temperature by placing the bag in a water bath before administration. Check the temperature by placing your wrist against the bag—it should feel comfortably warm, neither hot nor cold.
Step-by-Step Guide to Setting Up the Fluid Bag Method
Proper setup of your fluid administration system is crucial for safe and effective treatment. Follow these detailed steps carefully:
Initial Preparation Steps
Step 1: Remove protective packaging — Begin by carefully removing the fluid bag and the fluid drip set from their protective packaging. Inspect the bag for any signs of damage, leakage, or discoloration before proceeding.
Step 2: Locate and close the line lock — Find the line lock in the middle of the tubing (also called the fluid line). Close the line lock by moving the roller so it firmly squeezes the tubing, preventing fluid flow until you’re ready to begin administration. Most new fluid sets have the line lock initially set in the open position, so this step is essential.
Step 3: Expose the fluid bag exit port — Locate the exit port on the bottom of the fluid bag and carefully pull off the protective cover. This action exposes the hole that will accept the pointed end of the fluid set.
Step 4: Prepare the fluid set connector — Remove the protective cap from the top (pointed) end of the fluid set. Handle this carefully to maintain sterility.
Step 5: Connect the fluid set to the bag — Push the pointed end of the fluid set firmly into the open hole of the fluid bag. This action punctures the bag’s internal seal. Ensure the connection is secure to prevent any leaks during administration.
Priming the Fluid Line
Step 6: Fill the drip chamber — Gently squeeze and release the bulb at the top of the drip set (the drip chamber) until it is approximately half-full of fluid. This allows you to monitor the drip rate during administration.
Step 7: Fill the tubing with fluid — Remove the protective cap on the lower end of the fluid set. Open the line lock you previously closed, allowing fluid to flow through the tubing. It’s critical to ensure that all large air bubbles run out of the tubing completely, as air bubbles can cause discomfort or complications. During this process, do not allow the lower end of the fluid set to touch any surface.
Inserting the Needle and Administering Fluids
Once your fluid system is properly prepared and primed, you’re ready to begin the actual administration process. This phase requires careful attention to technique and your dog’s comfort.
Preparing Your Dog and Site Selection
Step 1: Prepare the fluid volume — Before beginning, your veterinarian will have specified exactly how much fluid to administer to your dog based on their condition, weight, and laboratory values. If you’re administering fluids in two separate locations on your dog’s body, divide the total recommended amount equally between both sites.
Step 2: Select the injection site — For most dogs, subcutaneous fluids are administered over the skin of the back, anywhere from the right and left shoulder blade area to the right and left hip region. Switch administration sites with each treatment to avoid repeatedly puncturing the same area. This rotation helps prevent tissue irritation and promotes better fluid absorption.
Step 3: Create the skin tent — Gently lift the skin at your selected injection site to form a triangular “tent” of skin. You may lightly wipe the area with alcohol, though this is not strictly necessary for sanitization. Some veterinarians recommend skipping alcohol as its odor and feel may agitate your dog.
Needle Insertion Technique
Step 4: Position the needle correctly — Lay the point of the needle at the base of the skin roll you’ve created (at the bottom of the “tent”). Keep the needle horizontal and pointing toward your dog’s head, assuming your dog is standing or in an upright position.
Step 5: Insert the needle with proper motion — Advance the needle slightly forward while simultaneously pulling the roll of skin toward the needle. This motion should be firm and steady, not hesitant or shaky. This coordinated movement places the needle point just under the skin in the subcutaneous space. You may feel slight resistance as you enter this space, which is completely normal.
Step 6: Confirm needle placement — Release the roll of skin. The point of the needle should remain securely positioned under the skin.
Fluid Administration
Step 7: Begin fluid flow — Grasp the fluid line lock with one hand. Move the roller upward to start the fluids flowing from the bag into your dog’s subcutaneous tissue.
Step 8: Monitor fluid administration carefully — Watch the measurement line on the fluid bag as it decreases, ensuring you administer the recommended amount. The line starts at the highest volume marking (for example, 1000 mL) and decreases as fluids are administered. If your veterinarian recommended 100 mL and you began at 1000 mL, you will stop when the line reaches 900 mL. The entire process typically takes 5 to 15 minutes depending on the volume being administered.
What to Expect During and After Administration
Understanding what’s normal during subcutaneous fluid administration helps you feel more confident and recognize any potential issues.
Observable Changes and Normal Responses
As the fluids flow into the subcutaneous space, a noticeable lump or swelling will form under your dog’s skin at the injection site. Do not be alarmed by this appearance—this pocket of fluid is completely normal and expected. Your dog should not experience pain or discomfort during or after the procedure. The fluid lump may look unusual, but it will be gradually absorbed over the next several hours as your dog’s body distributes and utilizes the hydration.
In some cases, especially if absorption is slow, gravity may cause the fluid pocket to migrate downward along the side of your dog’s body. In rare instances, fluids may even move under the skin toward the front or rear legs. While this appearance might seem concerning, rest assured that the fluids will still be properly absorbed and your dog will not experience pain or discomfort.
Post-Administration Care
After administering the fluids, clamp the IV line and carefully remove the needle from your dog’s skin. Apply gentle pressure to the injection site for approximately 60 seconds to prevent fluid leakage and promote proper sealing of the injection point. Wash your hands thoroughly with soap and water after completing the procedure, and properly dispose of all needles in a designated sharps container.
Essential Tips for Successful Administration
These practical recommendations will help ensure smooth and comfortable fluid administration for your dog:
Temperature matters: Ideally, fluids should be administered at approximately body temperature. While most dogs tolerate fluid administration quite well, unusually cold or hot fluids may cause discomfort. Warm fluids in a water bath to increase comfort, and verify temperature by placing your wrist against the bag.
Sterility is relative: It is usually not necessary to extensively “sterilize” the skin with alcohol before inserting the needle. Wiping a small amount of alcohol on the skin does not truly sterilize it, and the odor and feel of alcohol may actually agitate your dog, making the procedure more stressful.
Recognize complications: While infection is uncommon with subcutaneous fluid administration, contact your veterinarian if you observe persistent redness, swelling, pain, or discharge other than the temporary clear fluid expected after administration at the injection site.
Watch for side effects: Vomiting is a possible but very rare side effect of subcutaneous fluid therapy. Additionally, if your pet develops any coughing or difficulty breathing that begins after fluid therapy, take them to your veterinarian immediately.
Recommended Dosing Guidelines
Fluid administration volumes vary significantly based on your individual dog’s medical condition and needs. Professional guidelines recommend dosing ranges of 10 to 30 mL/kg administered one to two times daily, with the volume not exceeding 20 mL/kg per individual injection site. Your veterinarian will calculate the precise amount based on your dog’s weight, condition severity, and specific laboratory values.
The fluids administered are typically balanced isotonic solutions such as lactated Ringer’s solution or normal saline, carefully selected to match your dog’s electrolyte needs. Your veterinarian will provide explicit instructions regarding your dog’s specific fluid volume and administration frequency, so follow their guidance precisely.
Frequently Asked Questions About Subcutaneous Fluid Administration
Q: Is subcutaneous fluid administration painful for my dog?
A: No, subcutaneous fluid administration should not cause pain. While your dog may feel slight discomfort during needle insertion, the procedure itself is generally well-tolerated. The fluid pocket that forms under the skin will be gradually absorbed and should not cause pain or distress.
Q: How often will my dog need subcutaneous fluids?
A: The frequency depends on your dog’s specific condition and veterinarian’s recommendations. Most dogs receive subcutaneous fluids one to two times daily, though this varies based on individual needs and condition severity.
Q: Can I give subcutaneous fluids in the same location every time?
A: No, you should rotate injection sites with each treatment. Repeatedly administering fluids in the same area can cause tissue irritation and hinder fluid absorption. Switch between the shoulder blade area, hip region, and other appropriate back locations.
Q: What should I do if the fluid doesn’t flow properly?
A: If fluids are not flowing, check that the line lock is fully open and the needle is properly positioned under the skin. Ensure the fluid bag is hung at an appropriate height above the injection site. If problems persist, contact your veterinarian for guidance.
Q: How long does subcutaneous fluid administration take?
A: The procedure typically takes 5 to 15 minutes depending on the volume of fluid being administered. Larger volumes may take longer to infuse.
Q: What if my dog moves during administration?
A: Gentle movement during fluid administration is generally not a problem, though you should try to keep your dog calm and still to prevent needle dislodgement. If your dog moves suddenly or the needle comes out, stop the procedure and contact your veterinarian for guidance.
Q: Can I refrigerate the subcutaneous fluids?
A: No, fluids should not be refrigerated. Cold fluid administration can cause discomfort to your dog. Store fluids at room temperature and warm them to approximately body temperature using a water bath before administration.
Q: What conditions benefit most from subcutaneous fluid therapy?
A: Chronic kidney disease is the most common indication for at-home subcutaneous fluid therapy. However, other conditions causing dehydration or fluid loss may also benefit from this treatment approach.
References
- Subcutaneous Fluid Administration in Dogs — VCA Hospitals. https://vcahospitals.com/know-your-pet/subcutaneous-fluid-administration-in-dogs
- Administer Subcutaneous Fluids — Kindred Heart Animal Hospital. https://kindredheartvet.com/administer-subcutaneous-fluids/
- How to Give Subcutaneous Fluids to Dogs and Cats — PetMD. https://www.petmd.com/general-health/how-give-subcutaneous-fluids-dogs-and-cats
- Fluid therapy: Determining routes and rates of fluid administration — American Animal Hospital Association (AAHA). https://www.aaha.org/newstat/publications/fluid-therapy-determining-routes-and-rates-of-fluid-administration/
- Considerations for Creating a Fluid Therapy Plan — University of Illinois College of Veterinary Medicine. 2022-12-04. https://vetmed.illinois.edu/2022/12/04/considerations-for-creating-a-fluid-therapy-plan/



