

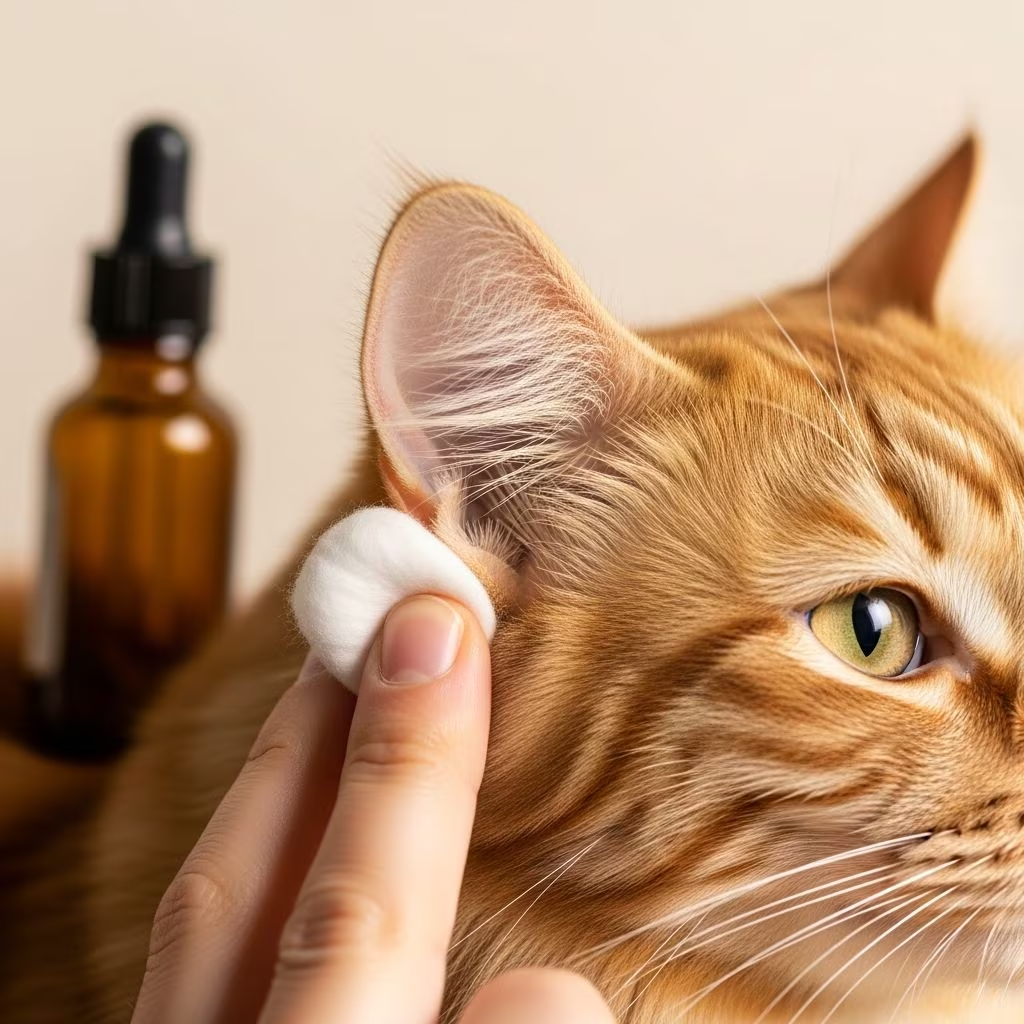
Maintaining proper ear hygiene is an essential component of your cat’s overall health and wellness routine. Cats are susceptible to various ear conditions, including infections, mite infestations, and wax buildup, all of which can cause discomfort and complications if left unaddressed. Understanding how to safely clean your cat’s ears and knowing which products are appropriate for use at home can help you maintain your feline companion’s auditory health while strengthening your bond through regular grooming care.
Understanding Your Cat’s Ear Structure and Cleaning Needs
A cat’s ear anatomy differs significantly from human ears, with a more complex structure that includes both vertical and horizontal ear canals. This unique design means that debris, wax, and moisture can accumulate more easily in the lower portions of the ear canal, making regular inspection and gentle cleaning necessary for some cats. The sensitivity of this area demands careful handling and the use of appropriate cleaning solutions that won’t irritate the delicate tissues within the ear.
Not all cats require frequent ear cleaning. Many healthy cats maintain their ears naturally through self-grooming behaviors. However, certain breeds with longer ear hair, cats with ear infections, or those prone to wax accumulation may benefit from periodic professional or at-home cleaning. Before beginning any ear maintenance routine, consult with your veterinarian to determine whether your specific cat needs regular cleaning and which methods would be safest for their individual health profile.
Natural Approaches and Oil-Based Solutions for Ear Care
While various natural products have been suggested for pet ear care over the years, the science behind their effectiveness remains limited. Oils and natural remedies have traditionally been used in some pet care practices, but modern veterinary medicine emphasizes using products specifically formulated and tested for feline ears. Natural oils, while seemingly gentle, can sometimes harbor bacteria or create an environment that promotes yeast growth if not properly applied or if the ear is already inflamed.
If you’re interested in incorporating natural elements into your cat’s ear care routine, this should only be done under veterinary guidance. Your veterinarian can recommend ear cleaning solutions that may contain natural ingredients but have been properly formulated and tested for safety in cats. Attempting to use household oils or unregulated natural products without professional advice may cause more harm than good, particularly if your cat has sensitive ears or an existing infection.
Essential Supplies for Safe Cat Ear Cleaning
Gathering the right materials before you begin ensures a smoother experience for both you and your cat. Here’s what you’ll need for a successful ear cleaning session:
- Veterinarian-approved ear cleaning solution – Your vet can recommend a product suitable for your cat’s specific needs and ear condition
- Cotton balls, cotton squares, or gauze pads – These are gentle and won’t damage the ear canal
- Cat treats – Use high-value rewards to create positive associations with the cleaning process
- Soft towel or blanket – This provides comfort and contains any liquid that may drip during cleaning
- Alcohol wipes – These sanitize the bottle nozzle if it accidentally touches your cat’s ear, preventing bacterial transfer
- Good lighting – A well-lit area allows you to see into your cat’s ear clearly and safely
- Optional helper – A second person can gently hold your cat while you perform the cleaning
Materials to Avoid at All Costs
Certain items should never be used in your cat’s ears, regardless of how gentle they seem. Cotton swabs or Q-tips are among the most dangerous tools for ear cleaning because they can penetrate too deeply into the ear canal and potentially puncture the eardrum or cause traumatic injury to the sensitive tissues. Additionally, pushing debris deeper into the canal defeats the purpose of cleaning.
Harsh astringents like vinegar, rubbing alcohol, and hydrogen peroxide should also be avoided. These substances can irritate inflamed or sensitive ear tissues and may cause pain or further complications. Even if your cat’s ears appear healthy, these products are too harsh for regular maintenance. Your veterinarian can provide or recommend appropriate cleaning solutions that balance effectiveness with gentleness.
Step-by-Step Guide to Cleaning Your Cat’s Ears
Preparation and Positioning
Begin by washing your hands thoroughly to prevent introducing bacteria into your cat’s ears. Create a calm, comfortable environment where your cat can relax. Some cats do better sitting on your lap, while others prefer being placed between your legs if you’re sitting on the floor. Wrapping your cat loosely in a soft towel can provide a sense of security without restricting their movement too much.
If you have a helper, they can gently hold your cat on a non-slip surface like a bath mat or your bed, allowing you to focus on the cleaning process. Ensure your cat is facing away from you, as this positioning makes accessing and cleaning the ears easier and more comfortable for both of you.
Applying the Cleaning Solution
Gently grasp the tip of your cat’s ear flap (pinna) and pull it back slightly to expose and straighten the ear canal. This positioning allows the cleaning solution to flow properly into the canal. Hold the bottle of ear cleaning solution close to the ear opening without allowing the nozzle to touch your cat’s skin. Squeeze a small amount of solution into the ear canal—enough to fill it completely, but don’t worry if some spills out onto the fur surrounding the ear.
If the bottle nozzle accidentally makes contact with your cat’s ear, immediately sanitize it with an alcohol wipe before continuing. This prevents the transfer of bacteria or yeast that could cause infections.
Massage and Debris Loosening
Continue holding the ear flap in place while using your other hand to gently massage the base of the ear, particularly the area just below the ear opening. Apply gentle pressure and massage in small circular motions for about 30 seconds. You should hear a subtle “squishing” sound as the cleaning solution works through the ear canal and breaks up accumulated wax and debris.
Your cat may find this sensation uncomfortable or ticklish, so maintain a calm, reassuring demeanor. If your cat becomes stressed, you can pause briefly before continuing or finish the second ear at a later time.
Natural Head Shaking and Debris Removal
After massaging, release your cat’s ear and allow them to shake their head naturally. This shaking motion helps move remaining cleaning solution and loosened debris toward the outer ear, where they can be easily wiped away. The liquid may spray, but it won’t harm your cat or damage their coat. Be prepared for this inevitable shaking by positioning yourself and your cat appropriately.
Wiping and Final Cleaning
Using fresh cotton balls or gauze pads, gently wipe away the debris and cleaning solution from the outer ear opening and inner ear flap. Add a few drops of the cleaning solution to your cotton pad if needed to help loosen stubborn material. Work only in the areas you can see and reach with your finger—never insert cotton balls deep into the ear canal. For any remaining solution in the outer canal opening, use a dry cotton pad to absorb the moisture.
Always use a new cotton pad each time you wipe, as reusing the same pad can spread bacteria from one area of the ear to another or from one ear to the other.
Completing the Process
Repeat the entire cleaning process with your cat’s other ear. If your cat shows signs of stress or discomfort, you may choose to clean the second ear at a different time rather than pushing through in a single session. Once you’ve finished both ears, reward your cat with their favorite treats and plenty of affection. This positive reinforcement creates a better association with ear cleaning and makes future sessions easier.
Frequency and Schedule for Regular Ear Maintenance
The frequency of ear cleaning depends entirely on your cat’s individual needs. Some healthy cats may need cleaning only once or twice a year, while others with predisposing conditions may benefit from monthly maintenance. Cats with chronic ear infections, those prone to excessive wax production, or breeds with longer ear hair typically require more frequent attention.
Before establishing a cleaning routine, your veterinarian should examine your cat’s ears and provide specific recommendations. They can also identify early signs of infection or other ear problems that might require professional treatment rather than home cleaning. Regular veterinary check-ups ensure that any changes in your cat’s ear health are caught and addressed promptly.
Recognizing When Professional Veterinary Care Is Needed
Certain ear conditions require professional veterinary intervention and cannot be managed through home cleaning alone. Contact your veterinarian if you notice any of the following signs:
- Redness, swelling, or inflammation inside the ear
- Discharge that is yellow, brown, or has an unusual odor
- Your cat constantly scratching at their ears or shaking their head
- Visible parasites or unusual debris in the ear
- Signs of pain when the ear is touched
- Hair loss around the ear area
- Changes in hearing or balance
These symptoms may indicate ear mites, bacterial infections, yeast infections, or other medical conditions requiring prescription treatment. Attempting home care when professional treatment is needed can allow the condition to worsen and potentially cause permanent damage to your cat’s hearing.
Building a Successful Ear Care Routine
Creating a positive experience around ear care makes the process easier for both you and your cat over time. Start by letting your cat become accustomed to having their ears touched gently during regular petting sessions. This desensitization helps your cat remain calm when it’s time for actual cleaning.
Establish a regular schedule if your veterinarian recommends periodic cleaning, and try to perform cleanings at the same time each month. Cats often adapt better to routine activities, and consistency helps them understand what to expect. Keep the experience brief—most cats can handle 10-15 minutes of ear attention without becoming overly stressed.
Never force a cleaning session if your cat is extremely distressed. Occasionally returning to the appointment and trying again later often works better than pushing through, which can create negative associations that make future cleanings even more difficult.
Common Questions About Cat Ear Care
Can I use olive oil to clean my cat’s ears?
While olive oil is used in some traditional ear care practices, it is not recommended as a primary ear cleaning solution for cats. Oils can trap moisture and potentially promote bacterial or yeast growth, particularly if the ear is already inflamed or infected. If you’re interested in natural approaches to ear care, discuss options with your veterinarian rather than experimenting with household oils.
How do I know if my cat’s ears need cleaning?
Healthy cat ears should appear pink inside with minimal wax or debris visible. A slight waxy substance is normal, but excessive accumulation, discoloration, or discharge indicates a need for cleaning or veterinary attention. When in doubt, consult your veterinarian for guidance on your specific cat’s ear health.
What if my cat won’t stay still during cleaning?
Having a helper hold your cat gently while you clean is often the most effective solution. Some cats also respond well to calming sprays designed for feline use or gentle handling techniques. If your cat remains extremely resistant, ask your veterinarian about professional cleaning options or whether your cat might benefit from brief calming medication before the procedure.
Can I clean my cat’s ears daily?
Daily cleaning is unnecessary for most cats and can actually irritate the ear canal. Over-cleaning removes natural protective oils and wax that serve important functions. Stick to the cleaning schedule recommended by your veterinarian, which is typically far less frequent than daily.
References
- How to Clean Your Cat’s Ears: A Step-by-Step Guide — Hill’s Pet Nutrition. 2024. https://www.hillspet.com/cat-care/routine-care/how-to-clean-cats-ears
- How To Clean Your Cat’s Ears — People’s Dispensary for Sick Animals (PDSA). 2024. https://www.pdsa.org.uk/pet-help-and-advice/pet-health-hub/other-veterinary-advice/how-to-clean-your-cat-s-ears
- How To Clean Your Cat’s Ears: Complete Guide — Mooresville Animal Hospital. 2024. https://www.mooresvilleanimalhospital.com/site/blog/2024/05/15/how-clean-cats-ears
- Instructions for Ear Cleaning in Cats — VCA Animal Hospitals. 2024. https://vcahospitals.com/know-your-pet/instructions-for-ear-cleaning-in-cats
- How to Clean Your Cat’s Ear at Home (6 Step Tutorial) — The Cat Butler. 2024. https://www.youtube.com/watch?v=21aKN-tcKrc
- How to Clean Your Cat’s Ears: A Complete Guide — PetMD. 2024. https://www.petmd.com/cat/general-health/how-to-clean-your-cats-ears



