

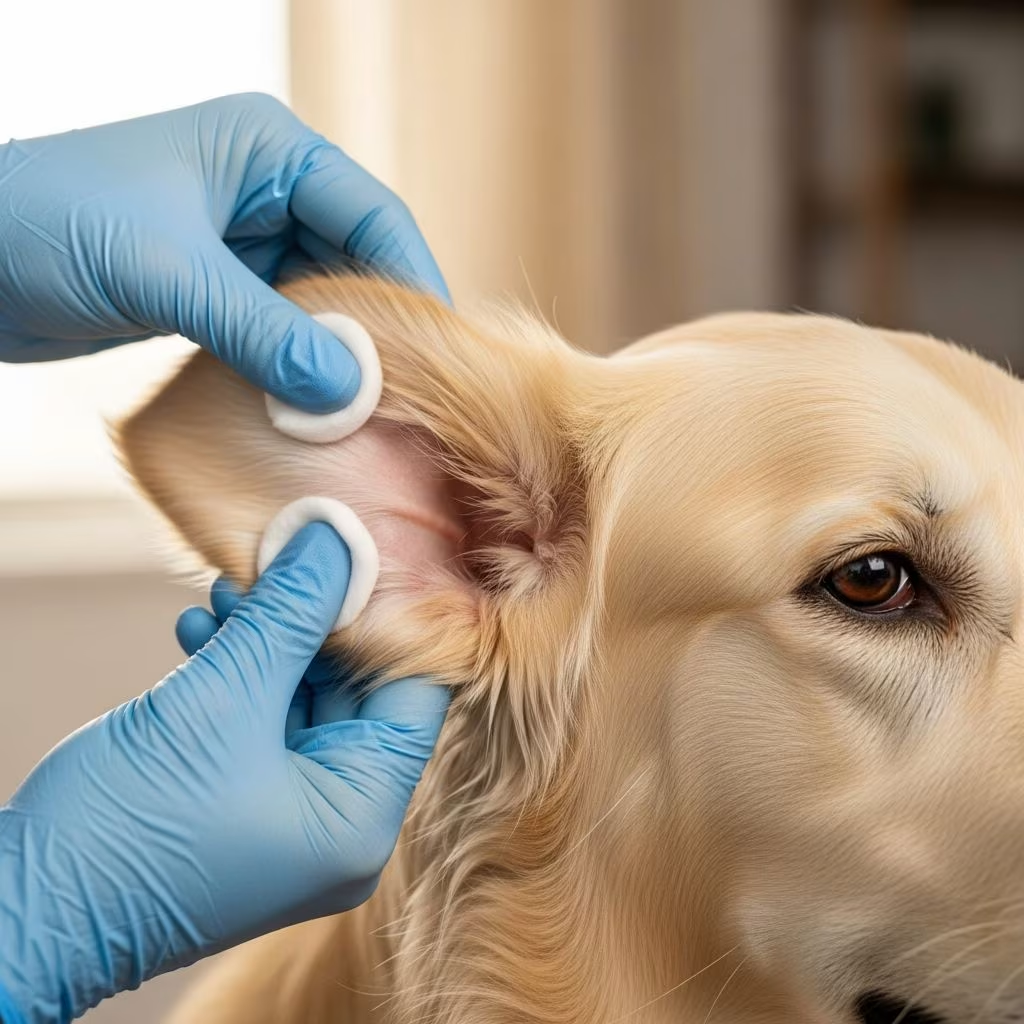
Your dog’s ears are sensitive structures that require regular attention and proper care to maintain optimal health. Unlike human ears, canine ear anatomy features longer, narrower ear canals that can trap moisture, debris, and wax more easily, making them prone to infections and discomfort. Understanding how to properly clean your dog’s ears at home is an essential skill for any pet owner, helping prevent common ear problems while strengthening the bond between you and your furry companion.
Understanding Your Dog’s Ear Structure and Care Needs
Dog ears differ significantly from human ears in both structure and function. The canine ear canal is L-shaped and considerably longer than the human ear canal, which means that debris, moisture, and wax can accumulate more easily in areas that are difficult to reach. This anatomical characteristic makes dogs more susceptible to ear infections, particularly in breeds with long, floppy ears or those with hair growing inside the ear canal.
Regular ear cleaning helps maintain a healthy ear environment by removing excess wax, dirt, and moisture that can create conditions favorable for bacterial and yeast growth. However, it’s important to recognize that not all dogs require the same frequency of ear cleaning. Your dog’s individual needs depend on several factors, including their breed, ear shape, activity level, and overall ear health.
Essential Supplies for Safe Ear Cleaning
Before beginning any ear cleaning routine, gather the proper supplies to ensure your dog’s safety and comfort. Using the right materials makes the process easier and reduces the risk of injury or complications.
- Cotton balls or gauze pads: Use real cotton, not synthetic alternatives, as they absorb moisture more effectively. Cotton allows you to gently wipe the ear without causing damage.
- Veterinarian-approved ear cleaning solution: Select a solution specifically formulated for dogs that contains no antibiotics, steroids, alcohol, or harmful additives unless prescribed by your veterinarian. Saline eye solution is considered one of the safest options.
- Towel: Keep a clean, dry towel nearby to absorb excess moisture and help your dog dry off afterward.
- Treats: Have rewards ready to create positive associations with the ear cleaning process.
What to avoid: Never use cotton swabs (Q-tips), hydrogen peroxide, rubbing alcohol, vinegar, or wax removal products. Cotton swabs can perforate the eardrum and push debris deeper into the ear canal, while harsh solutions can irritate sensitive ear tissue.
Preparing Your Dog for the Ear Cleaning Experience
Success in ear cleaning begins before you even apply any solution. Preparation sets the stage for a calm, positive experience that your dog will tolerate more willingly in the future.
Choose a quiet, comfortable location in your home where your dog feels relaxed and secure. Avoid attempting ear cleaning when your dog is overly excited, anxious, or stressed, as these states will make the process more difficult. Consider the time of day carefully—many dogs are calmer after exercise or during their usual rest periods.
For smaller dogs, placing them on a counter or table covered with a non-slip mat provides better access and control. Ensure the surface is stable and secure so your dog doesn’t feel unstable or anxious. Have all your supplies organized and within reach before you begin, minimizing disruptions once you start the process.
Hygiene is critical throughout the ear cleaning procedure. Wash your hands thoroughly with soap and water before beginning and after completing the task. This practice prevents introducing bacteria or yeast to your dog’s ears and prevents collecting pathogens on your fingernails that could be transferred to other areas. Some pet owners prefer wearing disposable gloves during the procedure for additional hygiene protection.
The Two Primary Ear Cleaning Techniques
Two effective methods are commonly used for cleaning dog ears at home. Each approach has advantages depending on your dog’s temperament, ear condition, and your comfort level. Many pet owners find that combining elements of both methods yields the best results.
The Gentle Wipe Method
This technique focuses on careful, external cleaning without introducing liquid deep into the ear canal. It works well for dogs with minimal wax buildup or those sensitive to having solution placed in their ears.
Begin by dampening a cotton ball or gauze pad with your chosen ear cleaning solution. Gently lift your dog’s ear flap to expose the inner surfaces. Starting at the outer edge of the ear, carefully wipe the inner flap and the visible outer portion of the ear canal using smooth, gentle strokes. Use a fresh cotton ball or gauze piece for each pass to avoid reintroducing debris. Continue wiping until you see no additional dirt or wax on the cotton material.
This method requires patience and multiple passes but avoids the sensation of liquid in the ear that some dogs find uncomfortable. It’s an excellent starting point for dogs new to ear cleaning or those with sensitive ears.
The Liquid Flush and Massage Method
This more intensive approach uses cleaning solution to loosen embedded debris, allowing your dog’s natural shake reflex to help expel it. It’s particularly effective for dogs with substantial wax accumulation or chronic ear issues.
Hold the ear flap upright and carefully apply the cleaning solution directly into the ear canal, filling it with enough liquid to completely saturate the canal. Be careful not to allow the bottle tip to contact the ear, as this can transfer bacteria. Once the solution is in place, gently massage the base of your dog’s ear for 20 to 30 seconds using firm, circular motions. You should hear a distinct squishing sound as the solution moves through the canal—this indicates the cleaner is effectively reaching all areas.
After massaging, release your hold and allow your dog to shake their head vigorously. This natural shake reflex helps loosen and expel loosened debris and excess solution from the ear canal. Most dogs enjoy this part of the process. Once they’ve shaken, use clean cotton balls or gauze to carefully wipe away all visible debris and excess solution from the outer ear canal and ear flap. Work from the inside of the ear outward toward the flap. Only insert cotton into the ear canal as far as your finger can easily reach—approximately one knuckle depth.
Step-by-Step Cleaning Process
Following a consistent, methodical approach ensures thorough cleaning while minimizing discomfort or potential injury to your dog.
- Position and stabilize: Have your dog sit or lie on their side in a comfortable position. Gently but firmly grasp the tip of the ear and pull the ear flap straight upward to expose and straighten the ear canal.
- Apply cleanser: Using your chosen method, either dampen a cotton ball with solution or squeeze liquid directly into the ear canal. Avoid inserting the bottle tip into the ear itself.
- Massage thoroughly: Gently work the solution or dampened cotton throughout the ear canal and surrounding tissue. Massage for at least 20 to 30 seconds to allow the cleanser to break down wax and debris.
- Allow head shaking: Release your hold and let your dog shake their head naturally to dislodge loosened material.
- Wipe away debris: Using clean cotton balls or gauze, carefully remove all visible debris, wax, and excess solution. Work from the inside of the ear outward, and never push cotton deeper than one knuckle.
- Dry completely: Use a dry towel or fresh gauze to gently remove any remaining moisture from the ear. Leaving moisture in the ear can create an environment favorable for infection.
- Repeat on the opposite ear: Always use fresh cotton or gauze when cleaning the second ear to prevent cross-contamination.
- Reward your dog: Immediately praise your dog and offer treats to create positive associations with the ear cleaning experience.
Frequency and Timing of Ear Cleaning
The appropriate frequency for ear cleaning varies considerably among individual dogs. Over-cleaning can irritate the ear canal and actually increase the risk of infection by disrupting the natural protective barriers of the ear. Conversely, under-cleaning can allow problematic debris accumulation.
Dogs with floppy ears, those prone to ear infections, and breeds with hair growing in their ear canals typically require more frequent cleaning—potentially weekly or bi-weekly. Dogs with upright ears and good air circulation may need cleaning only monthly or as needed. Some dogs rarely require routine cleaning if their ears remain clean and dry naturally.
The best approach is to consult with your veterinarian about your specific dog’s needs based on their breed, health history, and living situation. Your vet can recommend an appropriate cleaning schedule and alert you to any signs of ear problems that warrant more frequent attention or professional intervention.
Recognizing Signs of Ear Problems
Understanding the warning signs of ear issues helps you identify problems early and seek veterinary care promptly. Regular ear cleaning provides an opportunity to monitor your dog’s ear health closely.
- Excessive scratching, head shaking, or ear rubbing
- Redness or swelling of the ear flap or canal
- Foul or yeasty odor emanating from the ears
- Excessive wax buildup or unusual discharge (brown, yellow, or greenish)
- Visible signs of infection, such as crusty areas or scabs
- Hair loss around the ears from excessive scratching
- Signs of pain when the ear is touched or manipulated
If you notice any of these signs, contact your veterinarian before attempting home cleaning. Some ear conditions require professional treatment and can worsen with improper home care.
Common Mistakes to Avoid
Many well-intentioned pet owners inadvertently cause problems through common ear cleaning errors. Being aware of these pitfalls helps you provide better care for your dog.
| Mistake | Why It’s Problematic | Better Approach |
|---|---|---|
| Using cotton swabs (Q-tips) | Can perforate the eardrum and push debris deeper into the canal | Use cotton balls or gauze only |
| Inserting cotton too deep into the ear | Can damage the sensitive canal or lodge material inside | Only insert as far as one knuckle depth |
| Using harsh chemicals or home remedies | Irritates sensitive ear tissue and disrupts natural protective barriers | Use veterinarian-approved solutions only |
| Over-cleaning the ears | Can cause irritation and increase infection risk | Follow veterinarian recommendations for frequency |
| Cleaning during an active infection | Can worsen the condition or spread infection deeper | Seek veterinary diagnosis before home cleaning |
| Leaving moisture in the ear canal | Creates an environment favorable for bacterial and yeast growth | Thoroughly dry the ear after cleaning |
Making Ear Cleaning a Positive Experience
Your dog’s cooperation is essential for successful ear cleaning. Creating positive associations with the process makes future cleanings significantly easier. Start by introducing your dog to having their ears touched during regular petting sessions, well before attempting to clean them. Gently massage the base and outer parts of the ear while offering praise and treats, establishing that ear handling is associated with pleasant experiences.
When you begin actual cleaning, move slowly and deliberately. Explain your actions to your dog in a calm, reassuring tone. If your dog becomes anxious or resistant, pause the process, offer reassurance, and try again after a short break. Never force your dog through a cleaning if they’re significantly stressed, as this creates negative associations that make future cleanings more difficult.
Always conclude the ear cleaning process with generous praise and high-value treats. This reward reinforcement helps your dog understand that cooperating with ear cleaning results in positive outcomes. Over time, many dogs come to tolerate or even enjoy the attention and treats associated with ear care.
When to Seek Professional Veterinary Care
While regular home ear cleaning is an important preventive measure, certain situations require professional veterinary attention. If your dog shows signs of ear infection, experiences pain during cleaning, has significantly impacted wax that doesn’t respond to home cleaning, or has unusual discharge, schedule a veterinary appointment promptly. Your veterinarian can perform thorough ear examinations, obtain samples for analysis if needed, and prescribe appropriate medical treatment.
Additionally, if you’re uncertain about your dog’s specific ear cleaning needs or notice any changes in their ear health, consulting your veterinarian provides peace of mind and ensures you’re following the best approach for your individual dog’s situation.
References
- Dog Ear Care: How and When to Carefully Clean Your Dog’s Ears — Veterinary Dermatology Clinic. https://www.vetdermclinic.com/dog-ear-care-carefully-clean-dogs-ears/
- How to Clean Dog Ears: A Safe and Easy Guide — Northwoods Veterinary Clinic. https://northwoodsvet.com/how-to-clean-dog-ears/
- How to Clean Dog Ears: A Step-by-Step Guide — GoodRx Pet Health. https://www.goodrx.com/pet-health/dog/how-to-clean-dog-ears
- Clean Your Dog’s Ears — Wake Veterinary Medical Center. https://wakeveterinarymedicalcenter.com/clean-your-dogs-ears/
- Instructions for Ear Cleaning in Dogs — VCA Animal Hospitals. https://vcahospitals.com/know-your-pet/instructions-for-ear-cleaning-in-dogs
- 5 Tips & Tricks for Cleaning Your Dog’s Ears at Home — Blue Springs Animal Hospital. https://www.bluespringsanimalhospital.com/services/dogs/blog/5-tips-tricks-cleaning-your-dogs-ears-home
- How to Clean your Dog’s Ears — Merck Veterinary Manual. https://www.merckvetmanual.com/multimedia/table/how-to-clean-your-dogs-ears



