

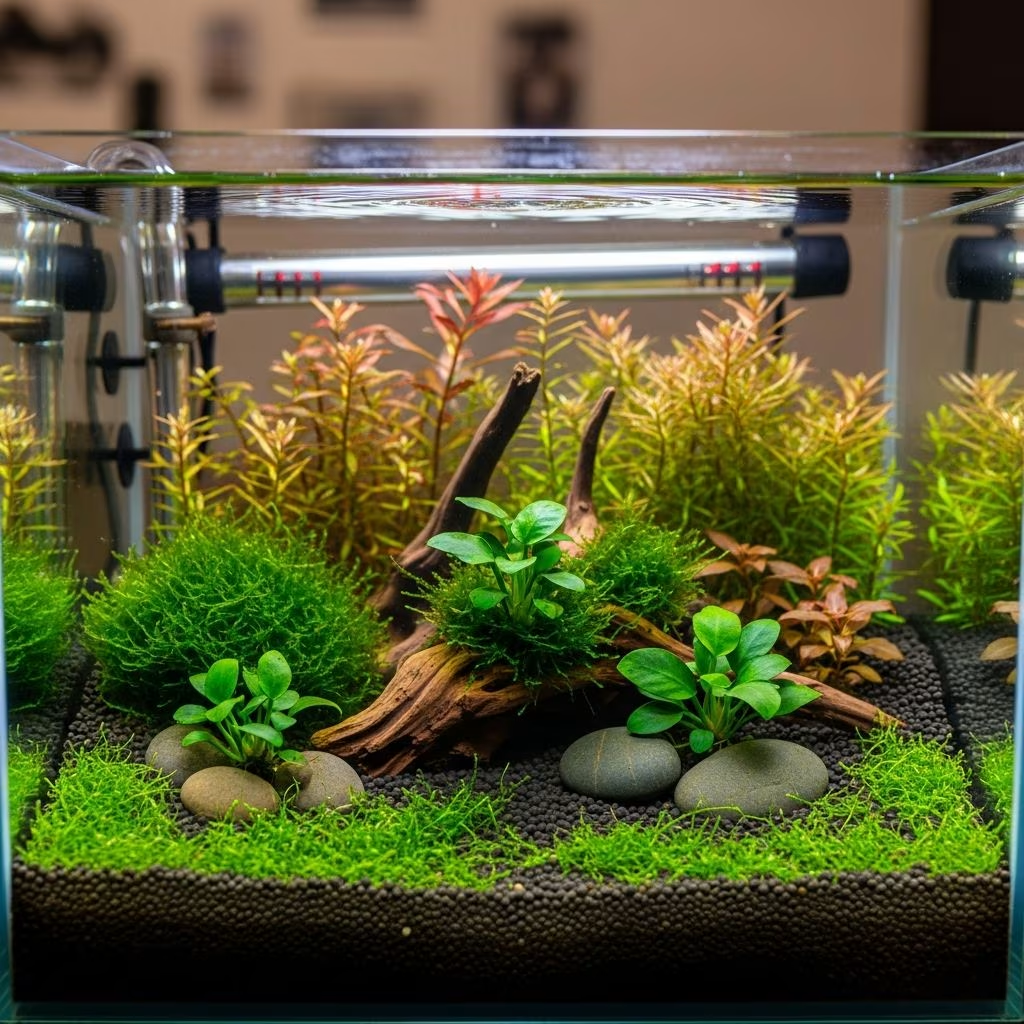
How to Set Up a Nano Tank: Complete Guide
Nano tanks have become increasingly popular among both beginner and experienced aquarists due to their compact size and the ability to create stunning miniature aquatic ecosystems. Whether you’re looking to add a decorative aquarium to your desk, bedroom, or living room, understanding how to properly set up a nano tank is essential for creating a healthy environment where your fish and plants can thrive.
Understanding Nano Tanks
A nano aquarium refers to tanks under 20 gallons, though some aquarists consider tanks under 30 gallons as nano tanks. These small aquariums offer a unique opportunity to create a complete underwater world in a compact space. The appeal of nano tanks lies not only in their size but also in the challenge and creativity required to maintain a balanced ecosystem within such a limited volume.
Before diving into the setup process, it’s important to understand that nano tanks require more attention to detail than larger aquariums. Water quality can change rapidly in smaller volumes, making filtration and regular maintenance critically important for success.
Choosing Your Nano Tank
The first step in setting up your nano tank is selecting the right tank size for your space and skill level. Nano tanks typically range from 2.5 to 10 gallons, with some extending up to 20 gallons depending on your definition. When selecting a tank, prioritize high-quality construction that will last for years.
Consider cell-cast acrylic or glass options, each with distinct advantages. Acrylic tanks offer a lightweight design with exceptional durability, while glass tanks provide excellent clarity and resist scratching over time. Your choice should be based on your living space, budget, and personal preferences regarding visibility and maintenance.
Selecting the Perfect Location
Where you place your nano tank significantly impacts its success. Choose a stable, room-temperature location away from direct sunlight, as this can cause rapid temperature fluctuations and promote excessive algae growth. The tank should be positioned away from cold drafts or heating vents that could affect water temperature stability.
Ensure the surface you select is sturdy and level, capable of supporting the weight of your filled tank. A dedicated aquarium stand is ideal, but any strong, level furniture works well. Additionally, consider placement for accessibility—you’ll need easy access for feeding, water changes, and filter maintenance. Optimal placement enhances visibility, allowing you to enjoy the thriving underwater ecosystem you’ve created.
Selecting and Installing Substrate
The substrate forms the foundation of your aquascape and plays a crucial role in your nano tank’s ecosystem. Your choice depends on whether you plan to heavily plant your tank or keep it relatively sparse.
Substrate Options
For planted nano tanks, opt for nutrient-rich substrates specifically designed to support plant growth. These substrates contain essential minerals and nutrients that plant roots absorb for healthy development. If you prefer fewer plants, standard gravel or sand with root tabs can work effectively. Soil substrates offer excellent plant nutrition but require careful layering to prevent compaction and anaerobic zones.
When adding sand, maintain a depth of no more than one inch to prevent anaerobic pockets that can release harmful ammonia. With gravel, you can vary the depths to create visual interest. For soil-based setups, place lava rock in mesh bags before covering with soil—this method provides height without excessive nutrients leaching into the water column.
Building Your Hardscape
Once your substrate is in place, it’s time to add rocks and wood to create your aquascape’s structure. The hardscape provides both aesthetic appeal and functional hiding spaces for your aquatic residents.
Choosing Wood and Rock
Driftwood and spider wood pieces measuring 6-15 inches are ideal for nano aquariums. For a natural, cohesive look, use one type of wood and include at least two pieces to allow flexibility in your design. Similarly, have slightly more rock than you think you’ll need during the initial planning phase.
Popular choices include Dragon Stone and Seiryu Stone in 15-pound quantities, which are perfectly proportioned for nano setups. Position water-neutral stone materials decoratively to create depth and visual interest. Position these materials in the back corners or along the sides to create natural focal points while leaving open swimming space for your fish.
Planting Your Nano Aquarium
Plants are essential to a thriving nano tank, providing oxygen, absorbing waste products, and creating a natural-looking environment. When selecting plants, consider the overall image you want to create and choose species appropriate for your tank’s conditions.
Beginner-Friendly Plants
Start with easy plants like Anubias and Java Ferns, which don’t require nutrient-rich substrate and can be glued or tied to rocks or wood. Rotala rotundifolia varieties add beautiful background color. Eleocharis acicularis provides delicate detail work in the midground. For foreground carpeting, Lilaeopsis brasiliensis and dwarf sagittaria create attractive low-lying plant beds.
When planting, use plant tweezers to position tissue cultures properly, spacing them approximately two inches apart. Place taller plants in the background and low-lying species in the foreground to create depth and perspective. Position background plants near your filter location; subsequent growth will naturally hide the equipment.
Installing Essential Equipment
Proper equipment selection and installation ensures your nano tank maintains stable conditions for years to come. Key components include filtration, heating, and lighting.
Filtration System
Filtration is absolutely critical for nano tank success. Because water quality can change rapidly in smaller volumes, a high-quality filter is essential for maintaining stable tank conditions. Choose a model offering three-stage filtration—mechanical, biological, and chemical—to comprehensively address water quality concerns.
Consider supplemental biological filtration such as a small sponge filter to boost the tank’s capacity to process waste. Install your nano corner filter in one of the back corners, where subsequent plant growth will naturally conceal it from view. Regular filter maintenance is a cornerstone of nano tank success; clean or change your filter frequently to prevent water quality deterioration.
Heating System
Include an aquarium heater to regulate temperature, ensuring your aquatic pets thrive at optimum conditions. Most nano tanks require heaters rated between 25-50 watts, depending on your target temperature and room conditions. Position the heater in a back corner, preferably near the filter for optimal water circulation.
Lighting
Lighting selection depends largely on your tank’s focus. Lighting is primarily cosmetic for fish-only tanks but becomes critically important for planted setups. Planted tanks require full-spectrum lighting that promotes photosynthesis. Invest in an adjustable LED fixture that allows you to control light intensity and photoperiod (typically 8-10 hours daily for planted tanks).
Adding Water and Cycling Your Tank
Before introducing any livestock, your tank must cycle—a biological process where beneficial bacteria establish themselves in your filter and substrate. This typically takes 4-6 weeks.
When adding water, use a paper towel as a barrier over your substrate to prevent it from swirling during filling. This maintains the careful layering you’ve created. Fill your tank slowly and carefully to maintain your hardscape positioning. After filling, install remaining equipment such as CO2 diffusers (if using) and verify all systems function properly.
Introducing Livestock
Once your tank has cycled and plants have established, you can introduce fish and invertebrates. Select compatible species appropriate for your tank size and setup.
Choosing Fish for Nano Tanks
Nano tanks are perfect environments for small schooling or shoaling species like tetras, rasboras, barbs, and danios. Generally, stock your tank with either a small school of one species or one or two showcase fish. Avoid overstocking—overcrowding rapidly degrades water quality in small volumes.
Consider compatibility carefully; aggressive or territorial species can cause stress in confined spaces. Research each species’ behavior, temperature requirements, and dietary needs before purchase to ensure harmonious cohabitation.
Managing Common Nano Tank Challenges
Even well-maintained nano tanks occasionally face challenges. Understanding how to address common issues ensures long-term success.
Algae Growth Control
Excessive algae growth stems from imbalanced lighting duration and nutrient levels. Control algae by maintaining proper lighting schedules (typically 8-10 hours daily), ensuring adequate water circulation, and introducing algae-eating organisms like plecos or nerite snails. Regular water changes remove excess nutrients that promote algal blooms.
Temperature Stability
Nano tanks’ small volumes make them susceptible to rapid temperature changes. Ensure consistent temperature levels by using a reliable heater and placing the tank away from drafts, direct sunlight, and heating vents. Monitor temperature regularly with an accurate thermometer.
Filtration Efficiency
Optimize filtration by selecting a system sized appropriately for your tank volume and performing regular maintenance. Weekly debris removal from filter media and monthly cleanings prevent clogging and maintain biological filtration capacity. Never replace all filter media at once, as this removes beneficial bacteria; rotate media gradually.
Water Quality Management
Test water parameters weekly, monitoring ammonia, nitrite, nitrate, and pH levels. Perform regular 25-30% water changes to maintain water quality and remove accumulated waste. In nano tanks, even small parameter changes can stress livestock significantly.
Maintenance Best Practices
Successful nano tank keeping requires consistent maintenance routines. Establish a weekly schedule that includes:
- Testing water parameters and recording results
- Performing 25-30% water changes
- Cleaning filter intake tubes and surfaces
- Removing algae from glass and hardscape
- Trimming plant growth as needed
- Observing fish behavior for signs of stress or illness
Monthly tasks include deeper filter cleaning, testing equipment function, and evaluating plant health. These consistent maintenance efforts prevent most common nano tank problems before they develop.
Nano Tank Setup Comparison
| Setup Type | Substrate Needs | Plant Selection | Filtration Level | Maintenance Frequency |
|---|---|---|---|---|
| Fish-Only | Basic gravel | None or minimal | Standard 3-stage | Weekly |
| Lightly Planted | Gravel + root tabs | Easy species (Anubias, Java Fern) | Standard 3-stage | Weekly |
| Heavily Planted | Nutrient-rich soil | Carpet, stem, and specialty plants | 3-stage + supplemental | Twice weekly |
Frequently Asked Questions About Nano Tanks
Q: What size is considered a nano tank?
A: Nano tanks typically range from 2.5 to 20 gallons, with most definitions considering tanks under 20 gallons as nano. The exact boundary can vary among hobbyists.
Q: How many fish can I keep in a nano tank?
A: This depends on tank size and fish species. Generally, use the guideline of 1 inch of fish per gallon, but research specific species requirements as some need more space than others.
Q: Do I need special equipment for a nano tank?
A: While equipment isn’t specifically “nano,” you need properly-sized components. Choose heaters rated 25-50 watts, appropriately-sized filters, and adjustable LED lighting for optimal results.
Q: How often should I perform water changes in a nano tank?
A: Perform 25-30% water changes weekly to maintain water quality. Nano tanks’ small volumes make them susceptible to rapid parameter changes, requiring more frequent maintenance than larger tanks.
Q: Can I use plants in a fish-only nano tank?
A: Yes, plants improve water quality in any tank. However, fish-only tanks need minimal lighting, while planted tanks require full-spectrum lighting to support photosynthesis.
Q: What’s the best location for a nano tank?
A: Choose a stable, level surface away from direct sunlight, drafts, and heating vents. Good visibility and accessibility for maintenance are also important considerations.
Q: How long does a nano tank cycle take?
A: Tank cycling typically takes 4-6 weeks as beneficial bacteria establish themselves. Test water parameters regularly and add livestock only after ammonia and nitrite levels reach zero.
Q: What causes rapid algae growth in nano tanks?
A: Excessive lighting duration, direct sunlight, and nutrient imbalances promote algae blooms. Control algae by maintaining 8-10 hour photoperiods, proper water circulation, and introducing algae-eating organisms.
References
- Nano Tanks: A Beginner’s Guide — TRUVU Aquariums. Accessed November 28, 2025. https://truvuaquariums.com/blogs/news/nano-tanks-a-beginners-guide
- Nano Aquarium Setup Tutorial — Dennerle Plants. Accessed November 28, 2025. https://dennerleplants.com/en/get-started/designing-living-homes/nano-aquarium/
- Nano Tanks – Everything You Need to Know — BRS Fresh. Accessed November 28, 2025. https://fresh.bulkreefsupply.com/content/post/everything-you-need-to-know-to-build-your-freshwater-nano-aquarium
- Nano Tank Setup Guide — Shrimpy Business. Accessed November 28, 2025. https://shrimpybusiness.com/blogs/shrimpy-business-blog/nano-fish-aquarium
- A Big, Small Change: Starting a Freshwater Nano Tank — TFH Magazine. Accessed November 28, 2025. https://www.tfhmagazine.com/articles/freshwater/a-big-small-change-starting-a-freshwater-nano-tank-full
- Easy Guide to Nano Aquariums — Dustin’s Fish Tanks. Accessed November 28, 2025. https://dustinsfishtanks.com/blogs/dustins-blog/nano-aquariums



