

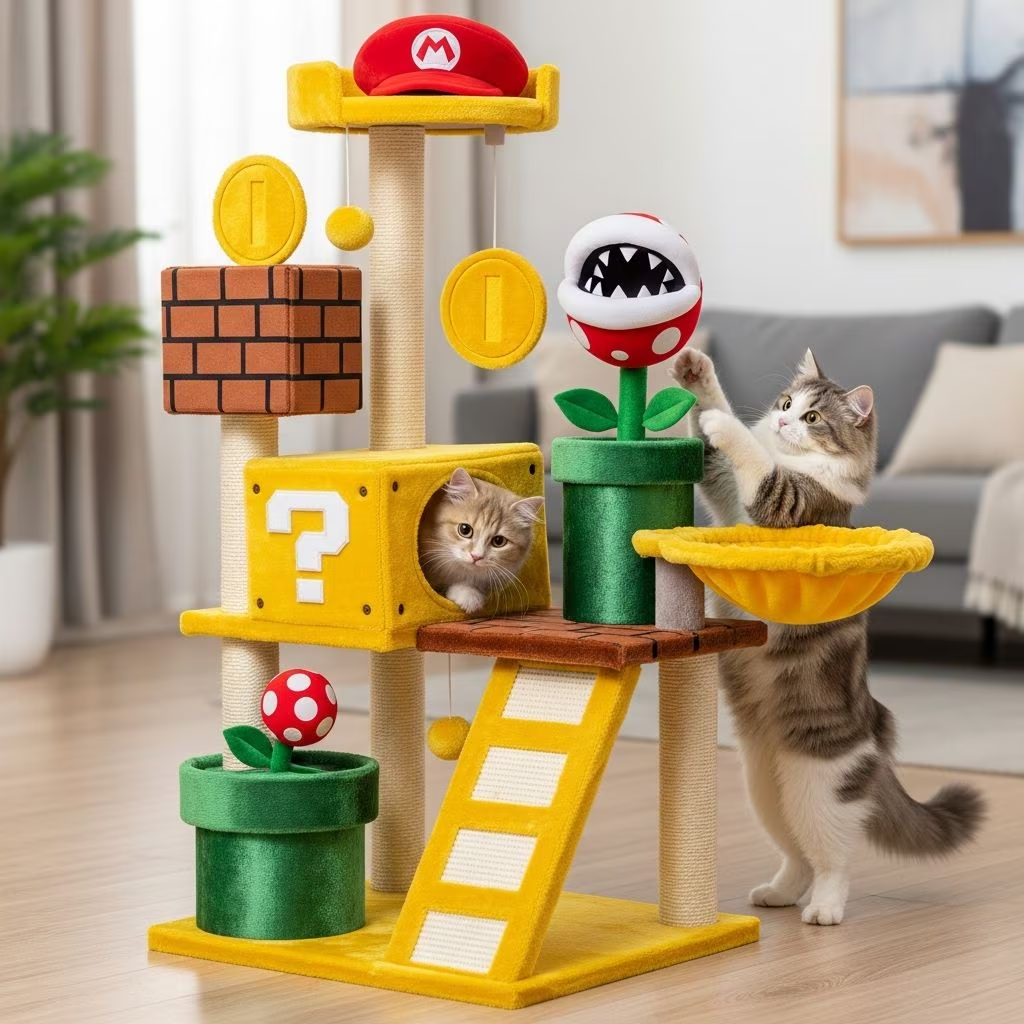
Standard pet store cat trees often lack style, featuring bland beige designs that clash with home decor. A **DIY Super Mario cat tree** transforms this necessity into a vibrant, game-inspired playground for your cat while adding personality to your space. This project uses affordable materials like wood planks, PVC pipes, and cat-safe paints to recreate iconic Mario elements such as brick blocks, warp tubes, and surprise boxes. It’s lightweight for wall hanging yet sturdy for climbing cats, scalable for multiple felines, and customizable for endless fun.
Building your own cat tree isn’t as daunting as it seems. With basic tools like a saw, drill, screws, and paint, you can complete this in a weekend. The result? A multi-level structure with tunnels, hiding spots, and scratching surfaces that keeps cats entertained and nails trimmed. Gamers and cat lovers will appreciate the nostalgic nod to Super Mario Bros., complete with green pipes and question mark blocks. Safety is paramount—use non-toxic paints and secure all parts firmly.
The Step-By-Step Guide on How to Make a Super Mario Themed Cat Tree
This guide breaks down the process into nine clear steps. Adjust dimensions based on your cat’s size: larger breeds may need wider platforms (e.g., 18-24 inches long), while kittens suit smaller scales. Total cost is typically under $100, depending on material sources.
1. Collect Your Wood
Start with lightweight yet rigid wood like plywood or pine boards, ideal for hanging without sagging under cat weight. You’ll need:
- Three longer pieces (full box length, e.g., 24×12 inches) for front, back, and base.
- Five shorter pieces (about one-third the length, e.g., 8×12 inches) for sides and top supports.
Measure precisely: the box should accommodate your cat comfortably when curled up. For multi-cat homes, extend to 30 inches. Source from hardware stores; opt for untreated wood to avoid chemicals. Pegboard variations, as seen in creative builds, add modularity for future expansions.
2. Cut the Holes
Select two longer pieces for holes—these become entry/exit points mimicking Mario warp pipes. Cut **circular holes** (8-10 inches diameter) on the far edges, not centers, leaving 2-inch borders for strength. Have a store cut them with a jigsaw or use a hole saw at home.
Ensure holes fit your cat’s shoulders comfortably—test with a cardboard mockup. One long piece remains hole-free as the solid base. Precision here prevents weak spots where cats might chew or pull.
3. Start Assembly
Lay the uncut long piece flat as the base. Attach two short side pieces to each end using wood screws (2-3 inches long) for stability. Add a holed long piece along the back, screwing securely into sides and base.
At this stage, you have a U-shaped box with open front and top. Use a drill for pilot holes to avoid splitting. Check for squareness with a level—crooked bases lead to wobbly trees.
4. Add the Other Side
Attach the final holed long piece to the front, flipping it so holes oppose diagonally (not directly across) for better cat navigation and tube fitting. Screw into sides firmly.
Cap the top with two short pieces on left and right, leaving a center gap for the surprise block. This creates a secure enclosure. Pro tip: countersink screws and fill with wood putty for smooth painting.
5. Painting
Prime the assembled box, then paint in **Mario brick style**: tan base coat with black mortar lines and red-brown bricks. Use pet-safe, non-toxic acrylic or latex paints (water-based, low-VOC). Apply 2-3 coats, drying fully between.
Paint before attachments for even coverage. Customize with clouds, coins, or Goombas using stencils for precision. Avoid oils or sprays that could flake.
6. Tubes
Source large **PVC pipes** (8-10 inch diameter, 12-18 inches long) from hardware stores—pre-made beats DIY for smoothness. Create the iconic thicker rim by gluing a wider wooden ring, rubber trim, or larger PVC around one end.
Line interiors with green carpet, felt, or sisal rope for scratching/comfort. Glue or staple securely. Paint exteriors glossy green. Two tubes provide dual entries, enhancing play value.
7. Prepare the Interior (Optional Enhancements)
Enhance comfort with soft inserts: wrap foam in fabric for perches, or add sisal scratching pads inside tubes. Some builds include storage for toys/snacks in base compartments. Ensure all fabrics are durable against claws.
8. Attach the Surprise Block
Craft a **question mark block** from a short wood piece (e.g., 8×8 inches), painting yellow with black ‘?’ and blue edges. Hinge it to the top center gap for easy cat rescue access—vital if they hide deep inside.
Screw hinges securely; add a latch for security. This mimics Mario’s power-up blocks perfectly.
9. Attach the Tubes
Secure tubes into holes with construction adhesive, screws, or brackets. Test stability by shaking vigorously—cats leap unpredictably. Hang the full tree on wall studs using heavy-duty anchors for safety.
Materials List
| Material | Quantity | Purpose | Notes |
|---|---|---|---|
| Plywood/Pine Boards (1/2-inch thick) | 8 pieces (3 long, 5 short) | Box structure | Lightweight, untreated |
| PVC Pipes (8-10″ diameter) | 2 (12-18″ long) | Warp tubes | Smooth interior |
| Cat-Safe Paint/Primer | 1 set (tan, green, yellow, black) | Decoration | Non-toxic, water-based |
| Sisal/Carpet/Felt | Enough for tubes/interior | Scratching/lining | Green preferred |
| Screws, Glue, Hinges | Various | Assembly | Wood screws 2-3″ |
| Tools | Saw, Drill, Paintbrush | Construction | Safety gear required |
Tools and Safety Tips
- Wear safety glasses and gloves during cutting and drilling.
- Work in ventilated areas for painting.
- Test weight capacity (aim for 20-50 lbs per cat).
- Supervise initial use; add climbing poles if needed.
Variations include pegboard bases for modular designs or fabric tunnels for softness.
Frequently Asked Questions (FAQs)
What materials are safest for cats?
Use untreated wood, non-toxic paints, and sisal—no small parts or sharp edges.
How long does it take to build?
4-8 hours over a weekend, plus drying time.
Can I make it freestanding?
Yes, add a wide base; wall-mounting saves space.
What if my cat doesn’t like it?
Incorporate familiar scents/toys; gradual introduction helps.
Is it suitable for kittens?
Scale down holes/platforms; supervise closely.
This **Super Mario cat tree** blends functionality with fun, enriching your cat’s environment while showcasing your creativity. Variations from community builds inspire endless tweaks.
References
- How to Make a Super Mario Cat Tree: A Step-by-Step Guide — Catster. 2023. https://www.catster.com/lifestyle/how-to-make-a-super-mario-cat-tree/
- I made a Mario cat tree for my cat! #catshorts — CatMonster (YouTube). 2025-03-25. https://www.youtube.com/watch?v=4jTnJ0h18U0
- Mario Brothers Cat Tree — Instructables. N/A. https://www.instructables.com/Mario-Brothers-Cat-Tree/
- Super Mario Enclosed Cat Condo — Catastrophic Creations. N/A. https://www.catastrophicreations.com/products/super-mario-enclosed-cat-condo



