

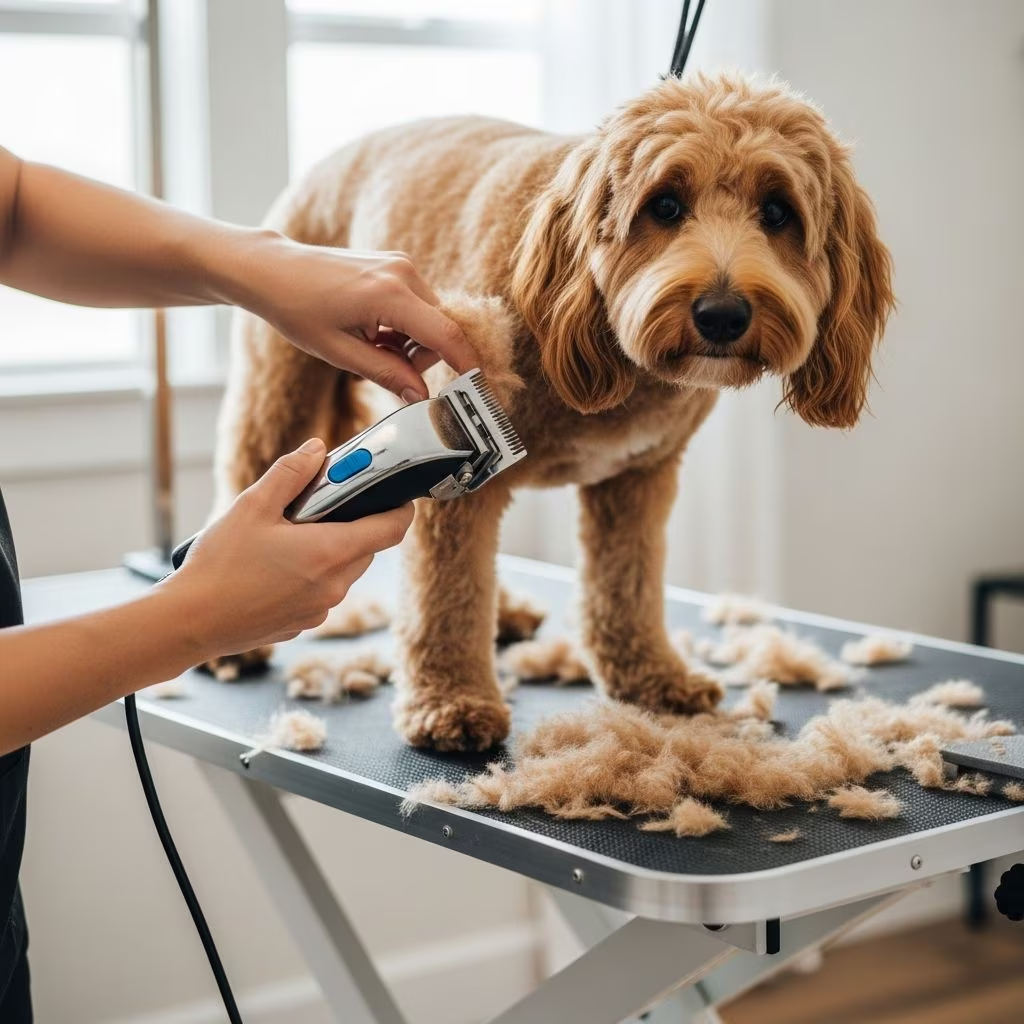
Grooming a Dog With Clippers: How to Give Your Dog a Haircut at Home
Grooming your dog with clippers at home can seem daunting, but with the right preparation, tools, and techniques, you can achieve professional-looking results without the expense of frequent groomer visits. This comprehensive guide will walk you through every step of the process, from preparation to blade maintenance, ensuring both you and your canine companion have a positive grooming experience.
Understanding Dog Clippers and Equipment
Before you begin grooming, it’s essential to understand the difference between various grooming tools. Dog clippers are larger, more powerful tools designed to cut longer body hair efficiently, while trimmers are better suited for detailed work and touch-ups around sensitive areas. Selecting the appropriate tool for each task will make the grooming process smoother and more effective.
Guide combs are color-coded attachments that fit over your clipper blade and determine how much hair remains after clipping. These guides are clearly marked to indicate the length of hair that will remain, though the actual length can vary depending on your dog’s coat texture and thickness. Starting with a longer guide comb allows you to see how the length looks on your dog’s specific coat before committing to a shorter cut.
Preparation Steps for Successful Dog Grooming
Proper preparation is the foundation of a successful grooming session. Following these steps will make the clipping process easier and safer for your dog.
Step 1: Bathe and Dry Your Dog Completely
Begin by giving your dog a thorough bath using quality dog shampoo and conditioner. Once bathed, dry your dog completely using a high-velocity dryer or towels. Clipping a clean, dry coat produces the best results and is significantly gentler on your grooming equipment. Moisture can cause clippers to malfunction and can lead to skin irritation. A completely dry coat also allows you to see the true texture and length of your dog’s hair, making it easier to plan your grooming approach.
Step 2: Thoroughly Brush and Comb the Coat
Use a brush and comb to work through your dog’s entire coat, removing any tangles, mats, or knots. This step is crucial because tangles and mats can catch in the clipper blade, creating discomfort for your dog and potentially damaging your equipment. Make sure you can easily run a dog comb through every section of hair. Pay special attention to areas behind the ears, under the legs, and around the rear, where mats commonly develop. Once the coat is completely tangle-free and sleek, you’re ready to proceed with clipping.
Step 3: Gather Essential Tools and Supplies
Before you begin clipping, assemble all necessary grooming tools within easy reach:
– Dog clippers with multiple blade options- Guide comb attachments in various lengths- Scissors with rounded tips for detailed work- Styptic powder or cornstarch to stop bleeding from accidental cuts- A soft brush or old toothbrush for blade cleaning- Clipper oil for blade maintenance- Grooming spray or coat conditioner to reduce static- Treats for positive reinforcement
Step 4: Acclimate Your Dog to the Clippers
Many dogs feel anxious about the sound and vibration of clippers. Help your dog become comfortable by turning on the clippers and allowing them to investigate and sniff the device. Let them hear the sound without the fear of being clipped. Gently touch their paws, ears, and other sensitive areas with your hands to help them become accustomed to being handled in these delicate zones. Reward calm behavior with treats and praise. This preparation significantly reduces stress during the actual grooming session and makes your dog more cooperative.
Steps for Clipping Your Dog’s Fur
Step 1: Choose the Right Blade and Test
Blade selection depends on your desired final length and your dog’s coat type. Start with a number 10 blade for sanitary areas and sensitive regions. For body clipping, choose a guide comb that’s slightly longer than your target length, as you can always go shorter but cannot add hair back. Before committing to clipping your dog’s entire body, perform a test clip on your dog’s underbelly to see if you like the resulting length. This conservative approach prevents disappointment and allows you to adjust your blade choice if needed.
Step 2: Clip the Sanitary Area First
Using a number 10 blade, carefully clip long hair away from the rectum and away from the vulva or penis to prevent urine from gathering in the fur. Keep the blade flat against the body to avoid accidental cuts or skin irritation. If you’re nervous about using the clipper blade directly on these delicate areas, use the shortest guide comb over your blade for added protection. This sanitary trim is hygienic and prevents matting in these sensitive regions.
Step 3: Determine Clipping Direction
Most professional groomers clip in the direction of the coat’s natural lay, working from the head toward the tail and from the shoulders and hips toward the toes. This technique follows the natural growth pattern of the hair. However, some pet owners find they achieve more even results by clipping against the lay of the coat. Clipping against the coat will produce slightly shorter hair than the guide comb indicates but may result in a more uniform appearance. Experiment to discover which method works best for your dog’s coat type.
Step 4: Clip the Body
Begin clipping the body with your chosen guide comb, starting at the shoulders and working systematically toward the tail. Use long, smooth strokes, allowing the weight of the clippers to do the work rather than pressing hard against the skin. Pressing too firmly can cause skin irritation, razor burn, or cuts. Maintain the blade flat against the body at all times. Leave at least one-half inch of hair to provide adequate protection from the elements and to prevent skin irritation. For optimal results, lightly spritz the coat with a grooming spray to reduce static electricity while you work.
Step 5: Move to Legs, Paws, and Tail
After completing the body, carefully clip the fur on your dog’s legs and paws. Pay special attention to the paw pads and trim hair growing between the toes to prevent matting and dirt accumulation. For the tail, if your dog has long or fluffy fur, use clippers to trim it to your desired length, working slowly and carefully to avoid accidents. Inspect the chest to determine if any additional trimming is needed, clipping any excess fur that hangs unevenly or doesn’t match the rest of the body.
Step 6: Finish the Head and Face
The head and face require the most care and precision. Before clipping, switch to an appropriate guide comb for the head area if different from the body. Place the clipper flat against the top of your dog’s head with the blade spokes facing toward the rear, then pull the clippers backward to push fur away from the upper brow. For the muzzle, begin at the bridge of the nose and pull the clippers downward toward the mouth.
When clipping between the eyes, place the guide comb flat against the forehead with blade spokes facing the nose, progressing slowly toward the nose while remaining vigilant about potential head movement. Gently hold the muzzle and point it toward the ceiling, placing the guide comb against the chin with spokes facing the throat, then run the clippers toward the throat to trim the underside.
For the ears, hold the ear tip between your fingers so only fur extends above your fingers, protecting the skin. Trim the hair along the ear edges carefully. If necessary, gently trim excess hair inside the ears using a smaller trimmer, but always avoid the ear canal. Use rounded-tip scissors to carefully trim any remaining longer hair around the face, working slowly to avoid accidentally cutting sensitive areas like the eyes, nose, and mouth.
Step 7: Check for Unevenness and Touch Up
Once you’ve completed initial clipping, brush and comb your dog’s coat again to identify any uneven spots or areas that need additional attention. Re-clip any sections that appear longer or uneven compared to surrounding areas. This final check ensures a polished, professional appearance.
Blade Maintenance and Care
Proper maintenance of your clipper blades ensures they remain sharp, clean, and ready for future grooming sessions. This crucial step extends the life of your equipment and maintains its cutting effectiveness.
Cleaning Your Blades
After each grooming session, use a soft brush or old toothbrush to remove hair residue stuck in and around the blade. Hair clippings can accumulate between the blade teeth and in the attachment combs, reducing cutting efficiency and potentially causing the clipper to overheat. Thoroughly brush away all tiny hair particles and debris from every crevice of the blade. Regular cleaning prevents these materials from clogging the blade and compromising performance.
Oiling and Storage
After cleaning, apply a few drops of clipper oil to the blade, following the manufacturer’s instructions. Clipper oil lubricates the blade, reduces friction, and prevents rust. Never store your clippers with accumulated hair or debris on the blades. Allow the oil to distribute through the blade mechanism, then wipe away excess oil with a clean cloth before storing your clippers in a dry location. Proper storage prevents blade corrosion and maintains optimal performance.
Common Mistakes to Avoid
Understanding common grooming errors helps you achieve better results and prevents injury to your dog. Avoid pressing the clipper blade against the skin too firmly, as this causes razor burn, cuts, and skin irritation. Don’t skip the brushing and combing steps, as mats and tangles cause clipper jams and discomfort for your dog. Never rush the process of acclimating your dog to the clippers or skip the test clip on your dog’s underbelly. Constantly switching between clippers and scissors wastes time and disrupts your workflow; instead, complete all clipper work first, organized by body section, then finish with scissor work. Finally, don’t neglect blade maintenance, as dirty or dull blades produce poor results and can injure your dog.
Tips for Efficiency and Safety
Organize your clipper work into focused sections for maximum efficiency. Perform all body clipper work first, then progress to the legs, followed by the head and ears, and finally sanitary clipper work. This systematic approach maintains focus and prevents you from missing areas. Keep all tools and supplies within arm’s reach to avoid interrupting your work flow. Once you develop proficiency, a complete grooming session should take 15 to 30 minutes. Always maintain the blade flat against your dog’s body, hold skin taut in areas where it’s loose, and scoop the clipper off the dog rather than dragging it to prevent clipper burn. Use positive reinforcement with treats and praise throughout the process to keep your dog calm and cooperative.
Frequently Asked Questions
Q: How often should I groom my dog with clippers?
A: Grooming frequency depends on your dog’s breed, coat type, and lifestyle. Dogs with continuously growing coats like Poodles or Doodles typically need clipping every 4 to 8 weeks, while other breeds may need it less frequently. Consult your breed-specific grooming guidelines or your veterinarian for recommendations.
Q: What blade size should I use for my dog’s coat?
A: Blade size depends on your desired length and coat type. Number 10 blades are ideal for sanitary areas and short cuts, while higher numbers (like 30 or 40) produce very short hair. Lower numbers create longer hair retention. Start with a longer guard comb and progress to shorter ones as you gain confidence.
Q: Can I groom a matted dog with clippers?
A: Mats must be removed before clipping. Clipping over mats can cause clipper blade damage and uncomfortable pulling on your dog’s skin. Use a dematting tool, brush, or comb to remove all mats and tangles first.
Q: What should I do if I accidentally cut my dog’s skin?
A: Stay calm and apply styptic powder or cornstarch to stop the bleeding. Clean the area gently with warm water. If the cut is deep or won’t stop bleeding after 10 minutes, contact your veterinarian immediately.
Q: How do I keep my dog calm during grooming?
A: Gradually acclimate your dog to the clippers by letting them investigate the tool when it’s off and on. Use treats and praise for calm behavior. Keep grooming sessions short initially, and consider grooming at a time when your dog is naturally relaxed.
Q: Is it better to clip wet or dry hair?
A: Always clip completely dry hair. Wet hair clogs clipper blades, and moisture can cause skin irritation and equipment damage. Dry hair also allows you to see the true texture and length more clearly.
References
- Grooming a Dog With Clippers: How to Give Your Dog a Haircut at Home — Chewy Education. 2025. https://www.chewy.com/education/dog/grooming/grooming-a-dog-with-clippers
- How to Cut Your Dog’s Hair with Clippers — Wahl USA. 2025. https://wahlusa.com/how-to/pet-grooming-guides/dog-care/hair-clipping
- Clipping Made Easy: How to Use Dog Clippers Safely and Effectively — Clip It Grooming. 2025. https://www.clipit-grooming.com/post/clipping-made-easy-how-to-use-dog-clippers-safely-and-effectively
- How to Groom a Dog Using Clippers — Wag Walking. 2025. https://wagwalking.com/grooming/groom-a-dog-using-clippers
- Pet Grooming Clipper Blade Chart: Size and Use — Elite Trim Grooming. 2025. https://elitetrimgrooming.com/blogs/dog-grooming-guide/pet-grooming-clipper-blade-chart-size-and-use
- Pet Clipping and Trimming Guide — Wahl. 2021. https://www.wahl.co.uk/app/uploads/2019/12/ZB619-Pet-clipping-how-to-guide-Rev.3-08-21.pdf



