

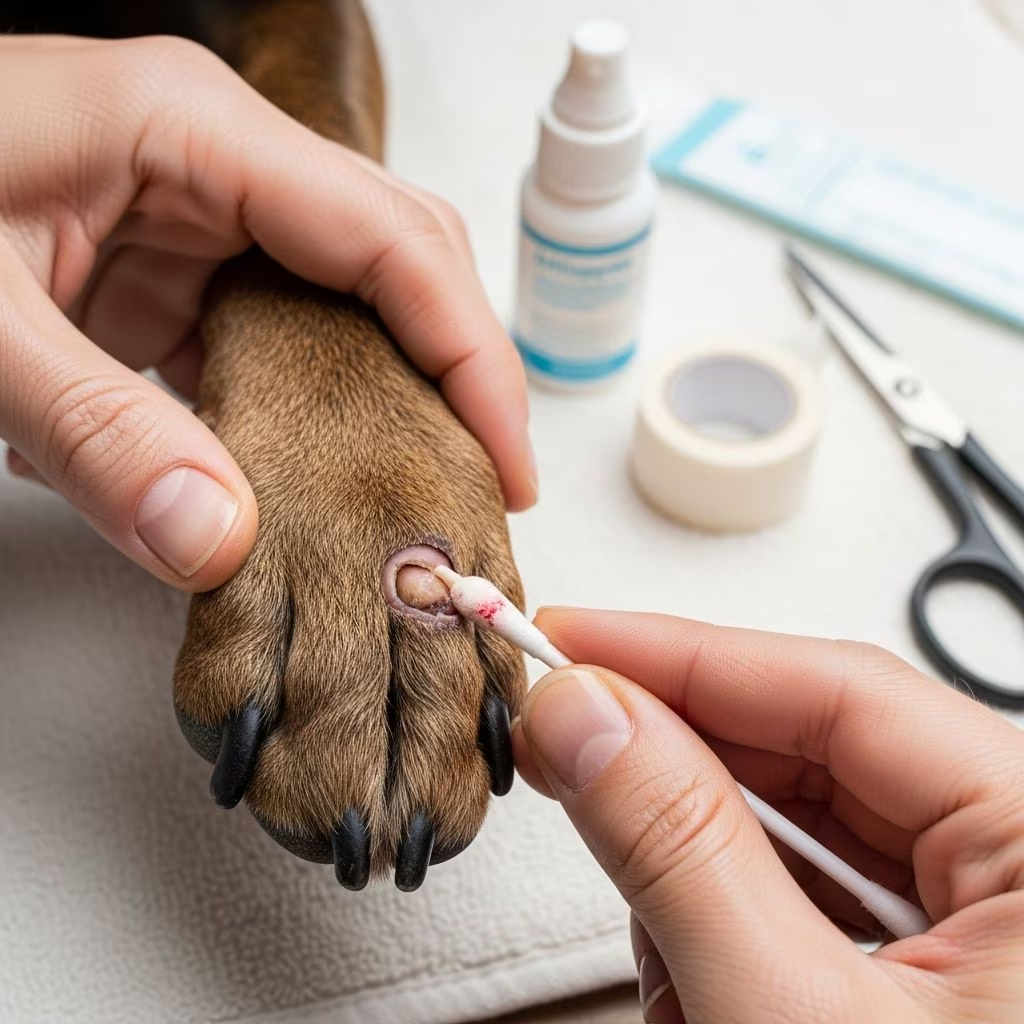
First Aid for Broken Nails in Dogs: A Complete Treatment Guide
If your dog yelps in pain and suddenly begins to limp or hold his paw up, a broken nail may be the culprit. Broken or missing nails can cause significant discomfort and may lead to serious infections if not treated promptly. Fortunately, with proper first aid knowledge, you can address this common injury effectively. Understanding the appropriate steps to take—from safe restraint to infection prevention—will help you provide immediate relief to your beloved companion and determine when professional veterinary care is necessary.
Step 1: Safely Restrain Your Dog
The first critical step in treating a broken nail is to safely restrain your dog. When your pet is in pain, even the friendliest dog may bite or struggle, potentially causing further injury to the damaged nail or injuring you during treatment. Have another person hold your pet securely while you tend to the nail. The key is to provide restraint in a calm, reassuring manner that makes your dog feel secure rather than threatened.
Consider asking someone your dog trusts to gently hold and comfort your pet during the treatment process. If your dog tends to get anxious or tries to nip when in pain, a muzzle may help avoid injury to yourself and prevent further trauma to your dog. Alternatively, provide a gentle hug-like restraint that immobilizes your dog while making him feel emotionally supported. This psychological comfort is just as important as physical restraint during this stressful situation.
Step 2: Control Bleeding
Once your dog is properly restrained, the next priority is to manage any bleeding. Dog nails tend to bleed quite heavily when torn or broken, so bleeding control is essential for both comfort and hygiene. Begin by wrapping the foot in clean gauze or a soft towel and apply gentle, steady pressure to the injured toe for five to ten minutes. This initial pressure helps the blood to clot naturally.
If the bleeding does not stop within five to ten minutes, you’ll need to use a more specialized approach. Several products can help stop bleeding quickly:
- Styptic pencils or powders, which contain a cauterizing agent that seals the wound
- Silver nitrate sticks, professional-grade hemostatic tools
- Cauterizing powder, available at pet stores and pharmacies
If you don’t have these products readily available at home, several household alternatives can be effective in a pinch. Applying baking powder or flour directly to the bleeding nail and compressing it with a towel can help stop the bleeding. Another surprisingly effective method is to gently press the tip of the nail into a bar of soap, which can help seal the wound. These home remedies work by creating a temporary seal that allows natural clotting to occur.
Step 3: Remove the Damaged Part of the Nail
After bleeding is under control, the damaged or broken part of the nail needs to be carefully removed. This step is often uncomfortable for your dog, but it can typically be accomplished quickly and often requires no sedation for minor breaks. However, if your dog is in significant pain or if the break is located very close to the nail bed, sedation and topical numbing via a nerve block may be necessary for humane treatment.
The nail should be trimmed above the break to completely remove the damaged portion. This careful trimming serves two important purposes: it eliminates the unstable, damaged section that could cause further injury, and it provides a healthy foundation for the nail to regrow properly. Your veterinarian has the expertise and proper tools to perform this procedure safely and efficiently, ensuring the break is handled correctly and your dog experiences minimal discomfort.
Step 4: Protect the Nail Bed From Infection
Protection from infection is absolutely crucial when treating a broken nail. The nail bed, also known as the quick, is attached directly to bone, which means that any infection penetrating this area can develop into a serious bone infection. Bone infections are extremely serious medical conditions that require aggressive treatment and certain antibiotics to resolve effectively.
Your veterinarian will likely apply antibiotic ointment or powder to the exposed nail bed and carefully bandage the foot to prevent contamination and minimize further bleeding. In many cases, an oral or injectable antibiotic may be prescribed as a preventive measure. This multi-layered approach to infection prevention is essential for ensuring proper healing and preventing complications.
Your dog’s foot will need to be closely monitored during the healing process. Your veterinarian will typically schedule a follow-up visit to examine the affected nail, remove or change the bandage, and assess the healing progress. These follow-up appointments are vital for catching any signs of infection early and adjusting treatment as needed.
Step 5: Control the Pain
Pain management is an often-overlooked but essential component of treating a broken nail. Your dog is experiencing genuine discomfort, and appropriate pain control not only makes your pet more comfortable but also reduces stress and anxiety during the healing process. Pain medication helps your dog rest properly, which is essential for optimal healing.
Your veterinarian can prescribe appropriate pain relief medication tailored to your dog’s specific situation. This might include oral pain medications or other analgesics that address your dog’s discomfort during the critical healing phase. Never attempt to give your dog human pain medications without explicit veterinary guidance, as many are toxic to dogs or could interfere with healing.
Protecting and Bandaging the Paw
Proper bandaging is essential for protecting the injured nail bed and promoting healing. Your veterinarian can show you how to wrap the paw in a loose-fitting bandage using first-aid tape to hold it securely in place. It’s important that the bandage be snug enough to provide protection but not so tight that it restricts blood flow or causes discomfort.
If your dog resists traditional bandaging, consider placing a clean sock over the paw and taping it into place. Many dogs tolerate socks better than rigid bandages, and they’re often less restrictive, making it more likely your dog will leave the bandage intact. If your dog persistently pulls off the bandage or sock, consider using a plastic cone (Elizabethan collar or “E collar”) around their neck for a few days until the wound heals sufficiently.
After two to three days, the wound should be healed enough that your dog will not lick it incessantly, and the E collar can typically be removed. However, continue to monitor the foot regularly for any signs of problems during the healing period.
Monitoring for Infection
Throughout the healing process, remain vigilant for any signs of infection. Warning signs include swelling around the nail bed, discharge from the wound, redness that worsens rather than improves, or a foul smell emanating from the injured toe. If you notice any of these signs, contact your veterinarian immediately. Your vet will likely prescribe antibiotics to clear up the infection and prevent it from spreading to deeper tissues.
Additionally, monitor your dog’s behavior for signs of pain or stress. If your dog refuses to put weight on the affected paw after several days, or if limping worsens rather than improves, these may indicate complications that require veterinary attention.
When to Seek Emergency Veterinary Care
While many broken nails can be managed with first aid at home, certain situations require immediate professional veterinary attention. You should take your dog to an emergency clinic if:
- Heavy bleeding that doesn’t stop within 10-15 minutes despite your efforts
- Visible bone or tissue exposure beyond the normal nail bed
- Signs of infection such as swelling, discharge, or fever
- Your dog is in extreme pain or refusing to bear any weight on the paw
- The nail is broken at the base, exposing the quick extensively
- Your dog shows signs of severe stress or shock
These symptoms indicate that the injury may affect deeper tissues and structures, requiring professional evaluation and treatment to prevent serious complications.
Building a Pet First Aid Kit
Being prepared is the best way to handle emergencies effectively. Keep a well-stocked pet first aid kit at home containing essential supplies for treating broken nails and other minor injuries. Your kit should include gauze pads, clean cloth or towels, styptic powder or pencils, antibiotic ointment formulated for pets, first-aid tape, elastic bandages, a recovery cone, and any other items recommended by your veterinarian.
Having these items readily available means you can respond quickly to your dog’s injury without delay, potentially reducing pain and preventing complications. Review your kit periodically to ensure supplies are fresh and replace anything that has expired or been used.
Prevention Tips for Broken Nails
While accidents happen, you can take steps to reduce the risk of broken nails in your dog. Regular nail trimming every three to four weeks helps maintain healthy nails at an appropriate length. Dogs that spend time on hard surfaces may naturally wear their nails down, but most dogs benefit from regular trimming. Be careful not to cut nails too short, as this can expose the quick and cause bleeding.
Provide your dog with appropriate surfaces for exercise and play. Avoid activities that might catch nails on rough surfaces, and inspect your dog’s paws regularly for signs of weakness or damage. Maintaining your dog’s overall health through proper nutrition also supports healthy nail growth and strength.
Frequently Asked Questions
What should I do immediately if my dog breaks a nail?
First, remain calm and prevent your dog from licking or chewing at the nail, as this can make the injury worse. Safely restrain your dog with help from another person, then control any bleeding by applying gentle pressure with gauze or a clean cloth for five to ten minutes. If bleeding continues, use styptic powder or household alternatives like flour or baking powder.
Can I treat a broken nail at home?
Many broken nails can be treated at home with basic first aid, especially if the break is minor and away from the nail bed. However, if the break is at the base, involves significant bleeding that won’t stop, or shows signs of infection, professional veterinary care is necessary. When in doubt, contact your veterinarian for guidance.
How long does it take for a broken nail to heal?
Most broken nails heal within two to four weeks, depending on the severity of the injury and how well you follow post-care instructions. The nail will gradually regrow and return to normal. If the nail bed has been damaged, regrowth may take longer or the nail may appear slightly different initially.
What products can stop the bleeding from a broken nail?
Styptic powder, styptic pencils, silver nitrate sticks, and cauterizing powder are all effective commercial products. If you don’t have these available, flour, cornstarch, or baking powder can work in an emergency. You can also press the nail into a bar of soap to help seal the wound.
When should I call the emergency vet for a broken nail?
Call an emergency veterinary clinic immediately if bleeding doesn’t stop after 10-15 minutes, if bone or tissue is visibly exposed, if your dog shows signs of infection, or if your dog is in extreme pain and refusing to put weight on the paw. These situations require professional evaluation to prevent serious complications.
Will my dog’s nail grow back normally?
In most cases, yes. The nail will regrow from the base over several weeks. However, if the nail bed or surrounding tissue has been significantly damaged, the new nail may initially appear slightly different in texture or color. It will typically normalize over time as new growth occurs.
References
- First Aid for Broken Nails in Dogs — VCA Animal Hospitals. Accessed November 2025. https://vcahospitals.com/know-your-pet/first-aid-for-broken-nails-in-dogs
- What To Do if Your Dog’s Nail Is Broken — MetLife Pet Insurance. https://www.metlifepetinsurance.com/blog/pet-health/dog-broken-nail/
- How to Treat a Broken Dog Nail: 5 Essential Tips — Petful. https://www.petful.com/pet-health/how-to-treat-a-broken-dog-nail/
- First Aid for Broken Nails on Dogs — PetMD. https://www.petmd.com/dog/care/first-aid-broken-nails-dogs
- Dog Broken Nail: Is It an Emergency? — Garden State Veterinary Specialists. https://gsvs.org/blog/dog-broken-nail-emergency/
- My Dog Has Broken A Nail. What Do I Do? — AllCare Pet Clinic. 2024-05-15. https://www.allcarepetclinic.com/site/blog/2024/05/15/dog-has-broken-nail



