

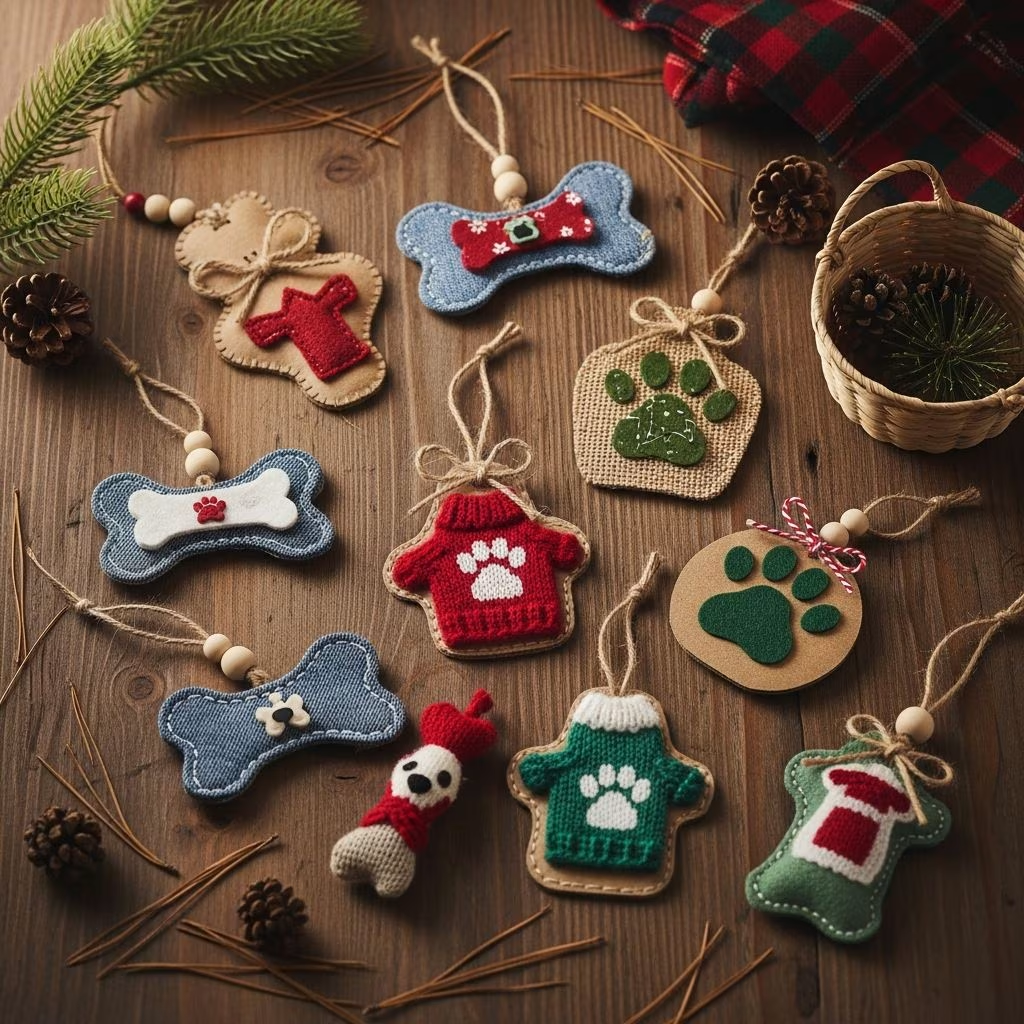
DIY Handmade Recycled Christmas Ornaments for Dogs
The holiday season brings joy, warmth, and cherished traditions to our homes. For dog lovers, what better way to celebrate than by creating personalized Christmas ornaments that feature your beloved canine companion? Whether you’re looking for an eco-friendly craft project, a heartfelt gift for fellow dog enthusiasts, or a way to immortalize your furry friend’s memory, handmade dog ornaments offer a meaningful and sustainable alternative to store-bought decorations. This comprehensive guide will walk you through various DIY approaches to create stunning, recycled Christmas ornaments that will become treasured keepsakes for years to come.
Why Choose Handmade and Recycled Ornaments?
Creating handmade ornaments from recycled materials combines creativity, sustainability, and sentimentality into one beautiful package. Unlike mass-produced ornaments, handmade pieces tell a story and carry emotional value. By using recycled materials, you’re also making an environmentally conscious choice that reduces waste and promotes sustainability. Additionally, handmade ornaments make exceptional gifts for dog lovers in your life, showing thoughtfulness and effort that commercial products simply cannot match. These ornaments can commemorate special moments with your furry friend, whether it’s celebrating a new puppy, honoring a beloved pet, or capturing a favorite memory frozen in time.
Materials You’ll Need
Before diving into your ornament-making project, gather the following materials:
- Iron-on transfer paper: Essential for photo-based ornaments
- White cotton fabric: Serves as the base for your pet’s image
- Patterned cotton or fabric scraps: Creates contrast and backing
- Gold double fold bias tape: Provides finishing edges and creates the hanging loop
- Batting or polyester filling: Adds dimension and softness to the ornament
- Air-dry clay or polymer clay: Alternative sculpting medium
- Acrylic paint or chalk paint: For coloring and decorating
- Recycled magazine paper or cardstock: Eco-friendly base materials
- Scissors and craft knife: Precision cutting tools
- Needle and thread: For hand-stitching ornament edges
- Hot glue gun or craft adhesive: Quick assembly option
- Ribbon or twine: For decorative elements and hanging
Method 1: Photo Transfer Fabric Ornaments
This popular technique creates adorable plush ornaments featuring actual photographs of your dog. The process combines photography, fabric work, and hand-stitching for a polished final product.
Step-by-Step Instructions
Step 1: Select and Prepare Your Photo
Begin by choosing the perfect photograph of your dog. Full-body shots or close-up face photographs work best for this technique. Sitting or lying-down positions create cleaner silhouettes than standing poses with extended legs. The image should be clear, well-lit, and show your dog’s personality. You can capture a fresh photograph or select a favorite from your collection.
Step 2: Print on Transfer Paper
Print your chosen image onto iron-on transfer paper following the manufacturer’s specific instructions. Transfer paper typically comes with detailed guidelines regarding printer settings, ink type, and application methods. Since your image is a dog without text, you won’t need to worry about mirroring or reversing the photograph. Begin with a slightly larger print than your finished ornament size to ensure complete image transfer.
Step 3: Prepare Fabric Pieces
Cut three fabric squares: one piece of plain white cotton for mounting the transferred image, one piece of patterned fabric for the back, and a 6-inch piece of gold double-fold bias tape for the hanging loop. Cut a piece of batting slightly smaller than your fabric squares. All pieces should be approximately 4-5 inches square, depending on your desired ornament size.
Step 4: Transfer Image to Fabric
Iron the printed transfer onto the plain white cotton following the transfer paper instructions. Use appropriate heat settings and allow sufficient time for proper adhesion. Once complete, let the fabric cool before carefully peeling away the backing paper. The cooling process helps the transfer adhere more completely and peels off cleaner than when warm.
Step 5: Trace Your Dog’s Outline
Hold the transferred fabric against a bright window or light source so you can clearly see through the fabric. Using a pencil or fabric marker, trace around your dog’s shape, leaving approximately 1/4 inch of space beyond the actual body outline. This buffer zone ensures you won’t accidentally cut off portions of your pet’s image during sewing.
Step 6: Assemble the Ornament Sandwich
Create a layered sandwich in the following order from bottom to top: patterned backing fabric, batting, loop of folded bias tape positioned at the top edge, and finally the image fabric placed face-down. This arrangement ensures proper alignment and creates a secure hanging loop.
Step 7: Sew the Ornament
Using a needle and thread (or sewing machine), sew along the pencil line you traced around your dog’s shape. Leave approximately 1.5 inches unsewn along one edge to allow for turning the ornament right-side out and filling. Use small, consistent stitches for durability.
Step 8: Finish the Edges
Trim excess fabric to approximately 1/4 inch from your stitch line. Cut small notches around curved areas (ears, head, legs) to reduce bulk and allow smooth turning. These notches prevent fabric bunching when you flip the ornament right-side out.
Step 9: Turn and Stuff
Using a turning tool, chopstick, or similar implement, carefully turn the ornament right-side out through the opening. The iron-on transfer creates some stiffness, so work gently to avoid tearing. Once turned, use small amounts of batting to stuff the ornament, creating gentle dimension while maintaining a relatively flat profile.
Step 10: Close and Hang
Hand-stitch the opening closed using a ladder stitch or whip stitch for an invisible seam. Attach your completed ornament to your tree using the bias tape loop, or give it as a treasured gift.
Method 2: Clay-Based Ornaments with Stamps
This approach utilizes air-dry or polymer clay combined with decorative stamps to create textured, dimensional ornaments featuring dog-themed designs.
Creating Clay Ornaments
Preparation and Priming: Begin with wooden or plastic ornament bases. Apply primer paint using a quality paint primer, ensuring even coverage. The primer creates a smooth foundation for subsequent paint layers and helps colors adhere properly.
Clay Application: Roll out air-dry clay to your desired thickness and apply to the ornament surface using wood glue spread evenly with your fingers. Press the clay firmly onto the base, ensuring complete contact and smooth adhesion.
Stamping Design: Position your dog-themed stamp over the clay surface and apply even, firm pressure. Dog-themed stamps are readily available and feature various breeds and positions. Take your time during stamping to ensure all details transfer clearly to the clay. Allow the clay to dry completely overnight before proceeding to painting.
Painting and Sealing: Once dry, apply chalk paint or acrylic paint in colors that complement your stamp design. Chalk paint provides excellent coverage and creates a matte, elegant finish. After paint dries, apply a protective sealer to enhance durability and create a polished appearance. Consider adding metallic accents or detailed painting to emphasize specific design elements.
Method 3: Recycled Paper Ornaments
For the most eco-friendly approach, create ornaments entirely from recycled materials like magazine pages, newspaper, or cardstock.
Recycled Paper Construction
Base Creation: Cut cardstock or cardboard into your desired ornament shape—traditional circles, dog silhouettes, or bone shapes. Layer multiple pieces and glue together for added stability and dimension.
Paper Decoupage: Tear or cut colorful magazine pages, newspaper comics, or patterned paper into small pieces. Use decoupage medium or diluted white glue to adhere these pieces to your cardstock base in an appealing pattern. Overlap pieces for visual interest and cover the entire surface.
Dog-Themed Design: Incorporate dog-related images cut from magazines, printed illustrations, or hand-drawn designs. Create a collage that celebrates your pet’s personality or represents your love of dogs.
Finishing Touches: Seal the completed ornament with a protective coating of clear decoupage medium or varnish. Attach twine, ribbon, or recycled string for hanging. This method creates lightweight, unique ornaments that are virtually free and completely sustainable.
Method 4: Dollar Tree Makeover Ornaments
Budget-friendly dog ornaments can be created by personalizing inexpensive, pre-made ornament bases from discount retailers.
Customization Techniques
Paint and Embellish: Purchase plain or basic ornaments and transform them using acrylic paint, markers, or metallic pens. Paint dog-themed designs, your pet’s name, or the current year directly onto the ornament surface.
Photograph Incorporation: Trim photographs of your dog and glue them directly onto ornament surfaces. Create a photo collage or combine multiple pet photos on a single ornament.
Personalization: Add your dog’s name, the date, or meaningful phrases using paint pens, adhesive vinyl lettering, or hand-lettering techniques. These personalized touches transform generic ornaments into meaningful keepsakes.
Design Ideas and Inspiration
Consider these creative variations when designing your dog ornaments:
- Multi-pet combinations: Create ornaments featuring multiple family dogs together
- Breed-specific designs: Highlight your dog’s unique breed characteristics
- Milestone celebrations: Commemorate your dog’s birthday, adoption date, or first Christmas
- Memory ornaments: Honor beloved dogs who have passed away
- Artistic styles: Paint ornaments in watercolor, abstract, or folk art styles
- Seasonal variations: Add holiday elements like Santa hats, stockings, or winter themes
- Name and date combinations: Include your dog’s name and current year for annual collection building
Gift Ideas and Uses
Handmade dog ornaments make exceptional gifts for various occasions and recipients. Dog lovers on your gift list will cherish personalized ornaments featuring their own pets. New puppy owners appreciate ornaments celebrating their newest family members. Friends and family members enjoy receiving ornaments featuring their own dogs. These ornaments also make wonderful prizes for dog shows, competitions, or rescue fundraisers. Consider creating ornaments as thank-you gifts for veterinarians, dog trainers, or groomers who have cared for your beloved pet.
Storage and Preservation
Preserve your handmade ornaments for years of enjoyment by storing them properly. Use ornament storage boxes or egg cartons to prevent breakage and damage. Keep ornaments in a cool, dry location away from direct sunlight, which can fade colors and deteriorate materials. Consider photographing ornaments before storing them to create a digital record of your creations. Proper storage ensures your handmade treasures remain beautiful and meaningful for decades to come.
Tips for Success
Photography selection is crucial: Choose clear, well-lit photographs that showcase your dog’s personality and distinctive features. Sitting or lying positions create better silhouettes than complex standing poses.
Work with high-quality materials: Invest in good transfer paper, fabric, and paint for superior results. Quality materials ensure ornaments withstand repeated handling and display.
Practice patience during assembly: Allow adequate drying time between steps. Rushing the process can compromise final quality.
Protect your work: Use sealers and protective coatings to enhance durability and appearance, especially for ornaments that will be displayed or gifted.
Personalize thoughtfully: Include meaningful details like names, dates, or special messages that enhance the ornament’s significance.
Frequently Asked Questions
Q: How long do handmade dog ornaments last?
A: With proper care and storage, handmade ornaments can last indefinitely. Photo-transfer ornaments maintain their quality for decades, while clay and recycled paper ornaments similarly endure with appropriate handling and protection from extreme conditions.
Q: Can I make these ornaments with multiple dogs?
A: Absolutely! Create combination ornaments featuring all your pets together. This works particularly well with photo-transfer method or recycled paper collage approaches.
Q: What if I’m not crafty or artistic?
A: The photo-transfer method requires no artistic skill—just photography and basic sewing. Dollar Tree makeovers and simple paint applications also require minimal crafting experience.
Q: Can these ornaments be washed or cleaned?
A: Most handmade ornaments should be gently dusted rather than washed. Sealed clay ornaments tolerate gentle cleaning better than fabric or paper options. Avoid submerging any ornament in water.
Q: How much do these projects cost?
A: Costs vary by method. Recycled paper ornaments cost virtually nothing using materials you likely already have. Photo-transfer ornaments typically cost $3-8 per piece, while clay ornaments range from $5-12 depending on materials and embellishments.
Q: What’s the best transfer paper for photos?
A: Look for high-quality iron-on transfer paper specifically designed for photo printing. Follow manufacturer instructions carefully, as different brands may have slightly different application procedures.
Q: Can I make these ornaments with kids?
A: Yes! Dollar Tree makeovers, painting projects, and simple gluing activities work well for children with adult supervision. Photo-transfer projects require more precision but can be accomplished with parental guidance.
References
- DIY Custom Pet Christmas Ornament — Live Free Creative Co. 2024. https://livefreecreative.co/custom-pet-christmas-ornament/
- Handmade Christmas Ornaments for Dog Lovers | Gift Ideas — The Provincial Farmhouse. December 12, 2023. https://www.youtube.com/watch?v=yaKDkY92-x0
- Dog Handmade Ornament – Eco-friendly Recycled Paper Gift — Etsy. 2024. https://www.etsy.com/listing/859407464/dog-handmade-ornament-eco-friendly
- How to Make a Customized Christmas Ornament of Your Dog — Talent Hounds. 2024. https://www.talenthounds.ca/how-to-make-a-customized-christmas-ornament/



