

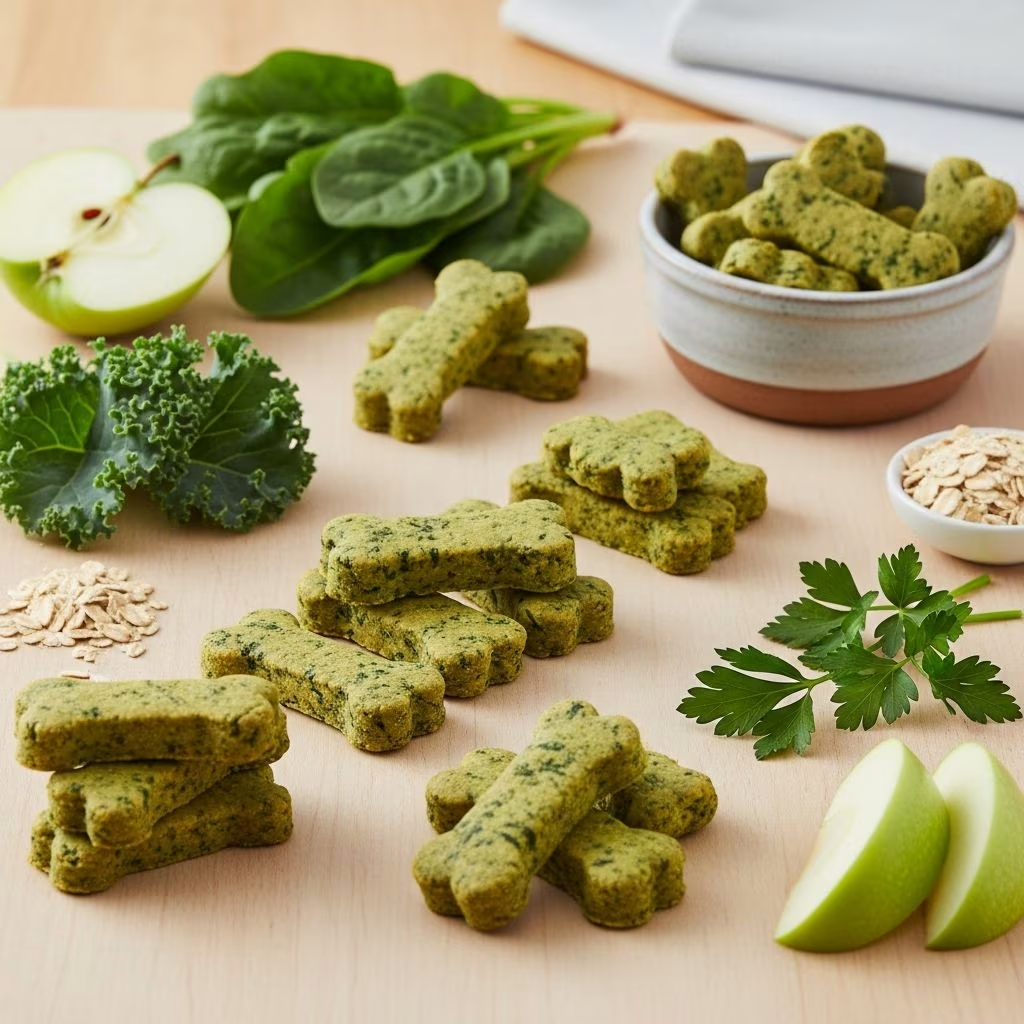
DIY Dog Treat: Low-Fat Green Machine Treats
Creating homemade dog treats is one of the best ways to ensure your furry companion receives nutritious, wholesome snacks without any artificial additives or preservatives. Among the most popular homemade dog treat recipes is the low-fat green machine treat, which combines nutrient-dense vegetables with simple, dog-friendly ingredients. These treats are not only delicious but also offer significant health benefits, making them an excellent choice for dogs that need to maintain a healthy weight or for pet owners who simply want to provide their canine companions with the best possible nutrition.
Green machine dog treats stand out because they are remarkably low in fat while being high in essential vitamins and minerals. The star ingredients—asparagus, green beans, and spinach—provide excellent nutritional value, delivering fiber, vitamins, and antioxidants that support your dog’s overall health. With just 3 percent fat content per treat, these homemade snacks are particularly suitable for dogs on weight management diets or those with specific dietary requirements. Additionally, the beauty of this recipe is that you can enjoy the leftover vegetables yourself, incorporating them into salads, roasting them in the oven, or adding them to your own meals, making this a practical recipe for health-conscious households.
Why Choose Low-Fat Dog Treats?
Low-fat dog treats serve multiple important purposes in your dog’s diet. For dogs that are overweight or prone to weight gain, these treats help satisfy cravings and provide positive reinforcement during training without adding excessive calories. Green beans, for instance, are recognized as excellent low-calorie fillers that can help dogs feel fuller while maintaining a healthy weight. Fat reduction is also crucial for dogs with certain health conditions, such as pancreatitis or digestive sensitivities, where high-fat diets can exacerbate symptoms.
The nutritional composition of green machine treats makes them ideal for all life stages. Puppies learning basic commands benefit from healthy, low-calorie reinforcement, while senior dogs appreciate treats that won’t contribute to joint stress or mobility issues associated with excess weight. The vegetables used in these treats contain natural antioxidants and phytonutrients that support immune function and help combat the effects of aging.
Understanding the Ingredients
Each ingredient in the green machine treat recipe has been selected for its nutritional benefits and dog-safety profile. Understanding what goes into these treats allows you to make informed decisions about your dog’s nutrition.
Fresh Vegetables
Asparagus brings vitamins K, A, and C to the recipe, along with folic acid and fiber. This vegetable supports bone health and provides antioxidant benefits. Asparagus should be chopped into small 1-inch pieces to ensure proper processing and digestibility.
Green Beans are among the safest vegetables for dogs, packed with plant fiber, vitamin K, and vitamin C. They are particularly beneficial for dogs watching their weight, as they are very low in calories but provide satisfying bulk and nutritional value. Dogs with a tendency toward obesity can benefit greatly from treats featuring green beans as a primary ingredient.
Spinach is a nutritional powerhouse containing iron, vitamins, and minerals that support various bodily functions. When incorporated into dog treats, spinach contributes to overall wellness and provides the characteristic green color that makes these treats visually appealing.
Binding Agents
Fat-Free Yogurt serves as both a binder and a source of probiotics, which support digestive health. Plain, unsweetened yogurt is essential—flavored varieties or those containing xylitol should be avoided as they can be harmful to dogs. The yogurt helps hold the ingredients together while adding minimal fat to the recipe.
Unsweetened Applesauce acts as a natural sweetener and additional binder, providing pectin that aids digestive function. Unlike sweetened versions, unsweetened applesauce doesn’t introduce unnecessary sugars that could contribute to weight gain or dental problems.
Flour Base
Whole Wheat Flour provides the structural foundation for these treats. Whole wheat contains more fiber and nutrients compared to white flour, supporting digestive health and providing sustained energy. The recipe uses 1.5 cups total—1 cup in the dough and an additional 0.5 cup for rolling purposes, ensuring you have enough flour to work with the vegetable mixture.
What You’ll Need: Equipment and Supplies
Before beginning your green machine treat adventure, gather the following supplies to ensure a smooth baking process:
- Food Processor: Essential for finely chopping vegetables into small, consistent flakes that distribute evenly throughout the dough
- Large Mixing Bowl: Needed for combining processed vegetables with wet and dry ingredients
- Rolling Pin: Helps flatten the dough to the correct thickness for cutting
- Cookie Cutter (1-inch round): Creates uniform treat shapes; alternatively, a bottle cap works perfectly if you don’t have a cutter
- Baking Sheet: Holds treats during the baking process; parchment paper or nonstick spray prevents sticking
- Spatula: Safely transfers baked treats from the sheet to a cooling surface
- Nonstick Cooking Spray: Prevents treats from adhering to the baking sheet
Complete Ingredient List
To prepare a full batch of approximately 35 treats, gather the following ingredients:
- 1 stalk of asparagus, chopped into 1-inch pieces
- 1 green bean, trimmed and chopped
- 1 cup fresh spinach, lightly packed
- 2 tablespoons fat-free yogurt, plain and unsweetened
- 1/4 cup unsweetened applesauce
- 1.5 cups whole wheat flour (1 cup for mixing, 0.5 cup for rolling)
- Nonstick cooking spray
Nutritional Information Per Treat
Understanding the nutritional profile of these treats helps you make appropriate serving decisions for your individual dog.
| Nutrient | Per Treat | Percentage of Calories |
|---|---|---|
| Calories | 15.4 | — |
| Protein | Minimal | 14% |
| Fat | Minimal | 3% |
| Carbohydrates | Moderate | 83% |
The remarkably low fat content—just 3 percent of calories—makes these treats exceptional for weight management. The high carbohydrate percentage reflects the whole wheat flour and vegetable content, which provides fiber and sustained energy for your dog’s daily activities.
Step-by-Step Instructions
Creating these green machine treats involves straightforward steps that even novice bakers can master.
Preparation Phase
Step 1: Preheat Your Oven
Begin by preheating your oven to 350 degrees Fahrenheit. This temperature ensures even baking without burning the delicate vegetables or creating overly hard treats that might be difficult for your dog to enjoy.
Step 2: Prepare Vegetables
Wash the asparagus and green bean thoroughly under running water. Using a sharp knife, chop the asparagus stalk into 1-inch pieces, discarding any woody portions near the base. Similarly, trim and chop the green bean into 1-inch segments. This consistent size ensures uniform processing and even distribution throughout the dough.
Step 3: Process Vegetables
Add the chopped asparagus, green beans, and spinach to your food processor. Pulse the mixture until it resembles small flakes rather than a smooth paste. The goal is to break down the vegetables into tiny pieces that will incorporate evenly into the dough while maintaining some texture.
Step 4: Transfer to Mixing Bowl
Carefully transfer the processed vegetable mixture into a large mixing bowl. Try to include all the liquid released by the vegetables, as this moisture will help bind your dough.
Mixing and Kneading Phase
Step 5: Add Wet Ingredients
Pour 2 tablespoons of plain, fat-free yogurt and 1/4 cup of unsweetened applesauce into the bowl with the processed vegetables. Using a spoon or spatula, mix these ingredients thoroughly until they are well combined and create a uniform mixture.
Step 6: Incorporate Flour Gradually
Add 1 cup of whole wheat flour to the mixture, but do this gradually—about 1/4 cup at a time. After each addition, mix thoroughly with a spoon or your hands. This gradual approach prevents lumps from forming and ensures the flour distributes evenly throughout the wet ingredients. If the mixture seems too wet after adding the full cup, you can add small amounts of the reserved flour as needed.
Step 7: Knead the Dough
Once the flour is incorporated, use your hands to knead the mixture into a cohesive ball of dough. Knead for several minutes, working the dough until it becomes smooth and manageable. If the dough remains too sticky, add small pinches of the reserved flour and continue kneading. The dough should be moist but not wet, holding together without being sticky to the touch.
Shaping and Baking Phase
Step 8: Prepare Baking Sheet
Spray your baking sheet lightly with nonstick cooking spray, ensuring even coverage to prevent the treats from sticking during baking.
Step 9: Roll Out Dough
On a lightly floured surface (using some of your reserved 1/2 cup flour), place the dough ball and use a rolling pin to flatten it into a sheet approximately 1/2 inch thick. Work gently to avoid overworking the dough, which can make the treats tough. If the dough cracks at the edges, you can gently press them back together.
Step 10: Cut Treats
Using a 1-inch round cookie cutter (or a bottle cap for a similar size), cut the dough into small rounds. Press the cutter straight down into the dough and lift straight up, wiggling slightly if necessary to release the treat. Place cut treats aside on the prepared baking sheet.
Step 11: Arrange on Baking Sheet
Space the cut treat rounds approximately 1/2 inch apart on the prepared baking sheet. This spacing allows for slight expansion and ensures air can circulate around each treat during baking.
Step 12: Bake Treats
Place the baking sheet in your preheated 350-degree oven for exactly 20 minutes. The treats should become firm and develop a slightly lighter color on top, indicating they are baked through.
Step 13: Cool and Store
Remove the baking sheet from the oven carefully. Using a spatula, transfer the warm treats to a plate or cooling rack. Allow them to cool completely at room temperature before serving to your dog. Once fully cooled, store the treats in an airtight container in the refrigerator for up to 7-10 days, or freeze them for longer storage.
Batch Yields and Serving Guidelines
This recipe produces approximately 35 individual treats, each containing just 15.4 calories. For a typical medium-sized dog, offering one treat per training session or snack time is appropriate. The small size makes these treats perfect for frequent positive reinforcement during training without adding excessive calories to your dog’s daily intake.
When incorporating these treats into your dog’s overall nutrition, remember that treats should constitute no more than 10 percent of your dog’s daily caloric intake, with the remaining 90 percent coming from their regular diet. Given the minimal calorie content of each treat, these green machine snacks can be offered more liberally than traditional high-calorie treats, making them an excellent tool for training and bonding.
Time and Temperature Summary
Preparation Time: 10 minutes
Baking Time: 20 minutes
Cooling Time: 15-20 minutes before serving
Oven Temperature: 350 degrees Fahrenheit
Total Batch Yield: 35 treats
Serving Size: 1 treat per dog
Storage and Shelf Life
Proper storage extends the life of your homemade treats and maintains their quality and nutritional value.
Refrigerator Storage: Keep baked green machine treats in an airtight container in your refrigerator for up to 7-10 days. The cool temperature slows any potential moisture absorption and keeps treats fresh.
Freezer Storage: For extended storage, place cooled treats in a freezer-safe container or bag and freeze for up to 3 months. Treats can be served directly from the freezer or thawed at room temperature for 15-20 minutes before offering to your dog. Frozen treats can actually be beneficial during warm weather, as they provide cooling refreshment while your dog enjoys their snack.
Benefits Beyond Your Dog
One of the excellent aspects of this recipe is sustainability and practicality for the entire household. Any leftover asparagus, green beans, or spinach that you process for the treats can be repurposed for your own meals. Roast the vegetables with a light coating of olive oil and your favorite seasonings for a nutritious side dish. Add them to fresh salads, blend them into soups, or incorporate them into pasta dishes. This approach minimizes food waste while ensuring that both you and your dog are benefiting from the same high-quality, nutritious ingredients.
Frequently Asked Questions
Q: Can I modify this recipe for dogs with specific dietary restrictions?
A: Yes, you can adapt the recipe. For grain-sensitive dogs, replace whole wheat flour with oat flour or coconut flour. For dogs allergic to specific vegetables, substitute spinach with pumpkin puree or replace asparagus with carrots. Always introduce new ingredients gradually and consult your veterinarian before making significant dietary changes.
Q: How long can I store these treats?
A: Refrigerate in an airtight container for 7-10 days, or freeze for up to 3 months. Always check for signs of mold or spoilage before serving, especially if stored in humid conditions.
Q: Are these treats suitable for all dog breeds and ages?
A: Yes, the low-fat, nutrient-rich formula makes them suitable for puppies, adult dogs, and seniors. However, puppies may need softer treats, so you can slightly moisten them with a little water if needed.
Q: Can I use frozen vegetables instead of fresh?
A: Absolutely. Frozen vegetables are just as nutritious as fresh and often more economical. Thaw them completely and drain any excess liquid before processing to avoid making your dough too wet.
Q: What should I do if my dough is too sticky?
A: Add flour gradually, a tablespoon at a time, until the dough reaches the right consistency. The dough should hold together without sticking excessively to your hands.
Q: Can dogs with pancreatitis eat these treats?
A: With only 3 percent fat, these treats are exceptionally low in fat and may be appropriate for dogs with pancreatitis. However, always consult your veterinarian before introducing any new treats to dogs with medical conditions.
Q: How do I know when the treats are properly baked?
A: After 20 minutes at 350°F, the treats should be firm to the touch and slightly harder than when they went into the oven. They will continue to harden slightly as they cool. If they still feel soft, bake for an additional 3-5 minutes.
Q: Is it safe to feed these treats to puppies?
A: Yes, these treats are safe for puppies. However, due to their firmness, slightly moisten them or break them into smaller pieces for very young puppies to prevent choking hazards.
References
- DIY Dog Treat: Low-Fat Green Machine Treats — Chewy Education. 2024. https://www.chewy.com/education/dog/food-and-nutrition/diy-dog-treat-low-fat-green-machine-treats
- Green Dog Treats Recipe: Low Calorie High Protein — Two Little Cavaliers. 2013. https://twolittlecavaliers.com/2013/02/green-dog-treats-recipe-low-calorie-high-protein.html
- Homemade Low Fat Dog Treats: Healthy Snacks for Your Furry Friends — Houndsy. 2024. https://www.houndsy.com/blogs/modern-tails/homemade-low-fat-dog-treats-healthy-snacks-for-your-furry-friends



